This little elephant is just so cute! You could turn him into a focal for a necklace or a bracelet, or add a pin to the back.
Brick stitch allows you to create almost any kind of shape imaginable The fun part of the stitch is that it's easy to increase and decrease to suit your needs. Cheri used the stitch to create this adorable elephant. See more inspiration for small brick stitch pieces and even some peyote stitch projects in this Artbeads Cafe episode.
Working with a comfortable length of thread, add a stopper bead with a 10 or 12-inch tail (you will use the tail to add more to your brick stitch later). The stopper bead will help you keep track of orientation when you are flipping your project.
To start the brick stitch, make a ladder stitch with four TOHO Treasure 11/0 opaque-pastel light gray seed beads, two TOHO Treasure 11/0 transparent rainbow black diamond seed beads, and three gray seed beads, as shown in fig. 1 of the Horton PDF diagram. You will start building your brick stitch toward the bottom of the elephant.
Continue the next row with an increasing brick stitch, as shown in fig. 2 of the PDF Diagram. Add an extra gray bead to this row using the ladder stitch.
Continue the next four rows (Rows 3-6) with an increasing brick stitch as shown in fig. 3 of the PDF Diagram. When you get to Row 7, start the row with an increasing brick stitch. Follow the color pattern and then end the row with a decrease.
For the next row, start with an increasing brick stitch, as shown in fig. 4 of the PDF Diagram. Then, add an extra gray bead to the increase with the ladder stitch. Follow the color pattern and end the row with an decrease.
For the next row, start with a decreasing brick stitch, as shown in fig. 5 of the PDF Diagram. Follow the pattern and only add 11 gray beads to this row.
For the next row, start with a decreasing brick stitch, as shown in fig. 6 of the PDF Diagram. Follow the pattern and end the row with an increase. Start the next row with a decreasing brick stitch and end with a decrease.
Start the next row with a decreasing brick stitch, as show in fig. 7 of the PDF Diagram. Add only eight gray beads to this row. Weave your thread so that it is coming out of the second-to-last bead in the previous row. Add a gray bead and go down through the last bead in the previous row. Go back up through the second-to-last bead in this row and up through the last bead in the new row.
Start the next row with a decreasing brick stitch and add only three gray seed beads, as shown in fig. 8 of the PDF diagram. Start the next row with a decrease and add three seed beads to end with an increase. Start the next row with an increase and add three seed beads to end with a decrease.
Weave your thread through the body of the elephant, as shown in fig. 9 of the PDF Diagram, so that your bead is exiting out of the third-to-last seed bead on the last row of the body. Start the next row with a decrease and add three beads to end with an increase. Start the next row with an increase and use three beads to end with a decrease. Start the next row with an increase and use three beads to end with a decrease.
Weave your thread through the body of the elephant as shown in fig. 10, so that it is in the proper position to start the trunk. Start the next row with a decrease and use three beads to end with an increase. Start the next row with a decrease and use three beads to end with an increase. Use two beads for the next row for a decreasing brick stitch. Use two beads on the next row to start with an increase and end with a decrease. Use two beads on the next row to start with an increase and end with a decrease.
Weave your thread down and back up through the trunk as shown in fig. 11 of the PDF Diagram in order to come out of the left-hand bead of the last row added. Add two beads to the next row for an increase. Add one bead to the thread and go down through the right-hand bead in the previous row and up through the left-hand bead. Go back up through the bead added. Go down through the left-hand bead again. Weave your thread back into the elephant to secure and trim.
Use the tail of your thread or start a new thread so that it is coming out of the top of the elephant's ear, as shown in fig. 12 of the PDF Diagram. Add a bead and go back down through the same bead in the previous row. Go up through the next ear bead in the previous row and back up through the bead added. Go back down through the second ear bead in the previous row and then go up through one gray bead over. Add another ear bead in the same manner here. Weave your thread into the elephant to secure and trim.
Once your piece is complete, you can use our Brick Stitch Findings Kit to stitch a pin back onto the back or incorporate it into your jewelry in other ways (try earrings) Take a look at our gallery image above to see how we added a pin to the back of our elephant.
List of Components TOHO Treasure 11/0 Opaque-Pastel Light Gray Seed Bead 2.5-Inch Tube (TTB11-767, qty 1) TOHO Treasure 11/0 Opaque-Lustered Navajo White Seed Bead 2.5-Inch Tube (TTB11-122, qty 1) TOHO Treasure 11/0 Transparent Rainbow Black Diamond Seed Bead 2.5-Inch Tube (TTB11-176, qty 1) TOHO Treasure 11/0 Matte Opaque Gray Seed Bead 2.5-Inch Tube (TTB11-611, qty 1)
Add all available items to your cart at once or edit the quantities below.
Any items with quantities lower than stated minimums will default to the minimum in your cart.
Nice choice! All or most of the products needed for this project are shown
below with quantities. Sometimes we sell out of components and aren’t able to order more from
the manufacturer (we know, it is very disappointing to us, too). Use the opportunity to mix up
the design and make it yours by substituting similar products or altering the entire color
scheme—it’s up to you!
Please wait while we add the products to your cart.
Horton
TOHO Treasure Seed Bead Brick Stitch Elephant
designed byCheri Carlson
Skill LevelIntermediate
TechniqueSeed-Beading
Time1-3 Hours
Approximate Size1 Inch
This little elephant is just so cute! You could turn him into a focal for a necklace or a bracelet, or add a pin to the back.
Brick stitch allows you to create almost any kind of shape imaginable The fun part of the stitch is that it's easy to increase and decrease to suit your needs. Cheri used the stitch to create this adorable elephant. See more inspiration for small brick stitch pieces and even some peyote stitch projects in this Artbeads Cafe episode.
Supplies
Tulip Assorted Beading Needles (4 pack)
Code NEED-28
$15.99
$19.99
×1
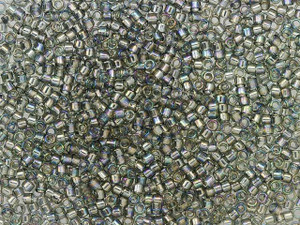
TOHO Treasure 11/0 Transparent Rainbow Black Diamond Seed Bead 2.5-Inch Tube
Code TTB11-176
$3.43
$4.37
×1
TOHO Treasure 11/0 Matte Opaque Gray Seed Bead 2.5-Inch Tube
Code TTB11-611
$5.37
$6.99
×1
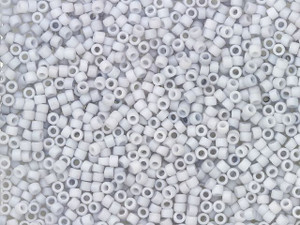
TOHO Treasure 11/0 Opaque-Pastel Light Gray Seed Bead 2.5-Inch Tube
Code TTB11-767
$6.29
$7.99
×1
KO Nylon Japanese Beading Thread, Light Gray (55-Yard Spool)
Code STRNG-0115
$7.19
$8.99
×1
Clearance - Was $1.20 - Silver-Plated 3/4-Inch Pin Back with 2 Holes (10pc pack)
Code FIND2569
$0.84
$1.20
×1
Step-by-Step Instructions
Working with a comfortable length of thread, add a stopper bead with a 10 or 12-inch tail (you will use the tail to add more to your brick stitch later). The stopper bead will help you keep track of orientation when you are flipping your project.
To start the brick stitch, make a ladder stitch with four TOHO Treasure 11/0 opaque-pastel light gray seed beads, two TOHO Treasure 11/0 transparent rainbow black diamond seed beads, and three gray seed beads, as shown in fig. 1 of the Horton PDF diagram. You will start building your brick stitch toward the bottom of the elephant.
Continue the next row with an increasing brick stitch, as shown in fig. 2 of the PDF Diagram. Add an extra gray bead to this row using the ladder stitch.
Continue the next four rows (Rows 3-6) with an increasing brick stitch as shown in fig. 3 of the PDF Diagram. When you get to Row 7, start the row with an increasing brick stitch. Follow the color pattern and then end the row with a decrease.
For the next row, start with an increasing brick stitch, as shown in fig. 4 of the PDF Diagram. Then, add an extra gray bead to the increase with the ladder stitch. Follow the color pattern and end the row with an decrease.
For the next row, start with a decreasing brick stitch, as shown in fig. 5 of the PDF Diagram. Follow the pattern and only add 11 gray beads to this row.
For the next row, start with a decreasing brick stitch, as shown in fig. 6 of the PDF Diagram. Follow the pattern and end the row with an increase. Start the next row with a decreasing brick stitch and end with a decrease.
Start the next row with a decreasing brick stitch, as show in fig. 7 of the PDF Diagram. Add only eight gray beads to this row. Weave your thread so that it is coming out of the second-to-last bead in the previous row. Add a gray bead and go down through the last bead in the previous row. Go back up through the second-to-last bead in this row and up through the last bead in the new row.
Start the next row with a decreasing brick stitch and add only three gray seed beads, as shown in fig. 8 of the PDF diagram. Start the next row with a decrease and add three seed beads to end with an increase. Start the next row with an increase and add three seed beads to end with a decrease.
Weave your thread through the body of the elephant, as shown in fig. 9 of the PDF Diagram, so that your bead is exiting out of the third-to-last seed bead on the last row of the body. Start the next row with a decrease and add three beads to end with an increase. Start the next row with an increase and use three beads to end with a decrease. Start the next row with an increase and use three beads to end with a decrease.
Weave your thread through the body of the elephant as shown in fig. 10, so that it is in the proper position to start the trunk. Start the next row with a decrease and use three beads to end with an increase. Start the next row with a decrease and use three beads to end with an increase. Use two beads for the next row for a decreasing brick stitch. Use two beads on the next row to start with an increase and end with a decrease. Use two beads on the next row to start with an increase and end with a decrease.
Weave your thread down and back up through the trunk as shown in fig. 11 of the PDF Diagram in order to come out of the left-hand bead of the last row added. Add two beads to the next row for an increase. Add one bead to the thread and go down through the right-hand bead in the previous row and up through the left-hand bead. Go back up through the bead added. Go down through the left-hand bead again. Weave your thread back into the elephant to secure and trim.
Use the tail of your thread or start a new thread so that it is coming out of the top of the elephant's ear, as shown in fig. 12 of the PDF Diagram. Add a bead and go back down through the same bead in the previous row. Go up through the next ear bead in the previous row and back up through the bead added. Go back down through the second ear bead in the previous row and then go up through one gray bead over. Add another ear bead in the same manner here. Weave your thread into the elephant to secure and trim.
Once your piece is complete, you can use our Brick Stitch Findings Kit to stitch a pin back onto the back or incorporate it into your jewelry in other ways (try earrings) Take a look at our gallery image above to see how we added a pin to the back of our elephant.
List of Components TOHO Treasure 11/0 Opaque-Pastel Light Gray Seed Bead 2.5-Inch Tube (TTB11-767, qty 1) TOHO Treasure 11/0 Opaque-Lustered Navajo White Seed Bead 2.5-Inch Tube (TTB11-122, qty 1) TOHO Treasure 11/0 Transparent Rainbow Black Diamond Seed Bead 2.5-Inch Tube (TTB11-176, qty 1) TOHO Treasure 11/0 Matte Opaque Gray Seed Bead 2.5-Inch Tube (TTB11-611, qty 1)