Whether you are doing peyote stitch, square stitch, weaving on a loom or any one of the many other bead stitches, the amount of thread you work with, the way you add thread when you run out, and the way you tie off the thread when you are done is basically the same. We will answer common questions beaders have when working with thread in bead weaving and then show you some examples of how this is done.
How much thread should I put on the needle?
Starting with the entire amount of thread needed for a project is not necessary. Regardless of the size of the project or the number of beads that are used, you should work with a manageable length of thread on the needle. A manageable length would be around one to two yards. If you use any more than that, you run the risk of the thread twisting, tangling and knotting. This can be frustrating and ultimately lead to the thread becoming a tangled mess or even breaking. Besides being difficult to manage, if the thread is too long, friction from weaving through the beads over and over will wear the thread out. It will become frayed by the time you get to the end or your project, making it less durable. The average project could use many yards of thread which would be impossible to work with. So plan on adding more thread as needed.
My thread is getting short, what do I do?
You will tie or finish the thread off by weaving it into the body of the project until it is secure. This will lock the thread in place. In the diagrams below, we show you how to do this on peyote stitch, loom or square stitch and a two-hole bead pattern. But remember, the general idea is the same for most stitches, even trims and fringe. Just follow the thread path of the stitch type you are working with and the following diagrams for an idea on how to go about locking in the thread. You don't have to follow the diagrams exactly, they are meant as a guidline.
Before you move on to the diagrams, there are some basic rules to consider:
Plan to tie off the thread before it gets too short. It is easier to tie the thread off if you have several inches to work with. Approximately 6 to 8 inches is a good amount. If you do this in the middle of a row it will be easier to hide the threads.
To keep the edges of the project clean, don’t weave on the outside. Do the weaving in the middle of the project.
Make sure to keep the thread inside the beads or between the rows of beads, not over a bead. When you are done, you shouldn't see any threads.
Don’t go through beads that you will need to go through again later if you can help it. You may not be able to get the thread through a particular bead or section of beads if you have multiple threads running through it. For example, if you plan on adding a trim or fringe, you will need to weave through the beads near the edges, so keep these clear of extra threads.
Test the thread by pulling on it. If it moves, switch directions, weave through a few more beads and test again.
Note: When doing Herringbone or Ndebele stitch, it is better to weave the thread following the thread path of the stitch without circling the thread through the beads. The nature of the stitch will lock the thread in place over the course of a row or two. Making circles with the thread will alter the "herringbone" pattern in the weave.
The diagrams in the steps below illustrate the same technique in three stitches to convey that the technique is the same for many different stitches.
| |
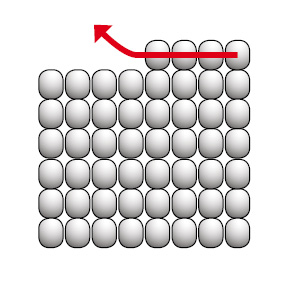
Peyote Stitch |
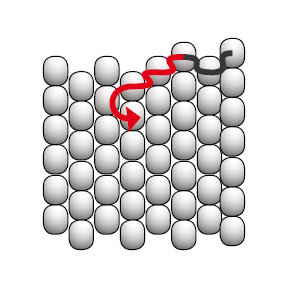
Loom or Square Stitch |
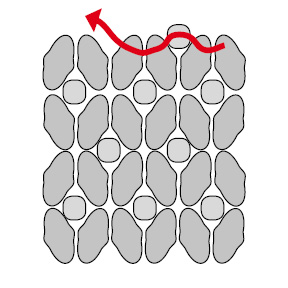
Two-Hole beads |
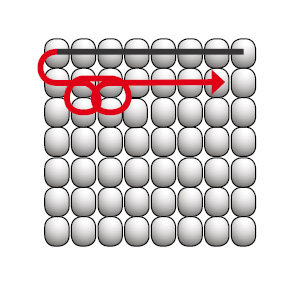
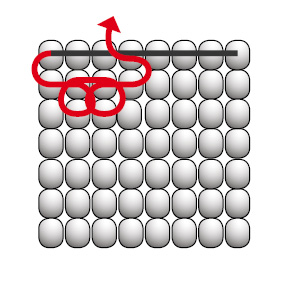
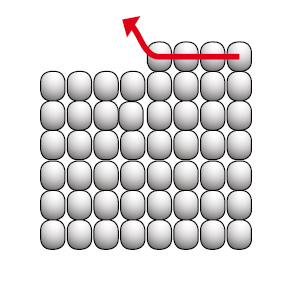
| Plan to end the thread in the middle of a row rather than at an edge. This will make it easier to hide. |
 |
 |
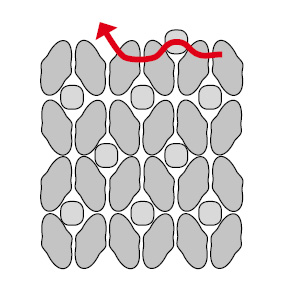 |
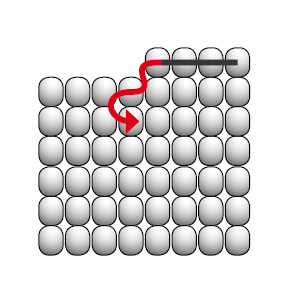
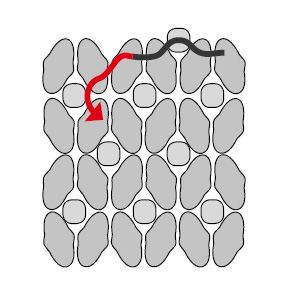
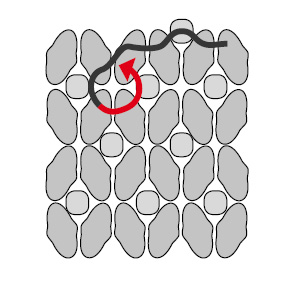
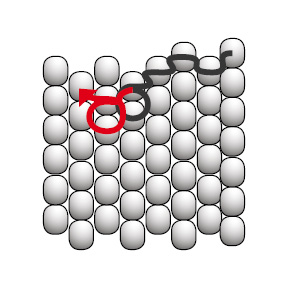
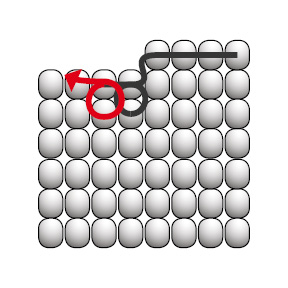
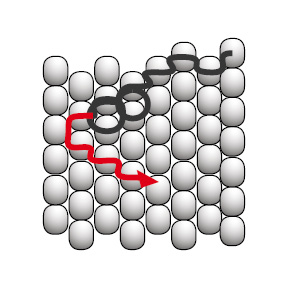
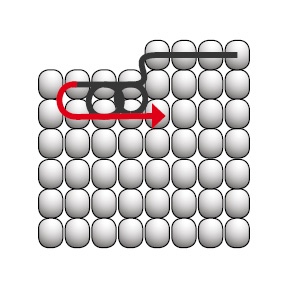
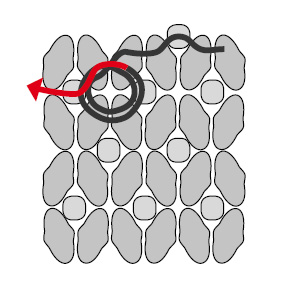
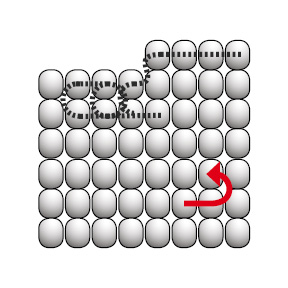
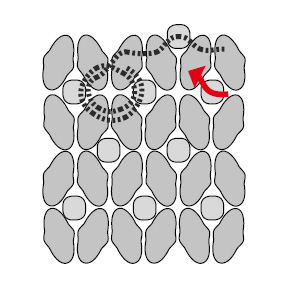
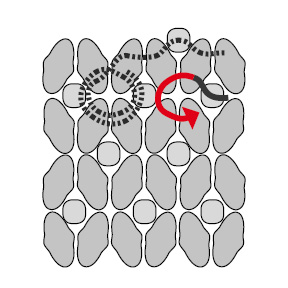
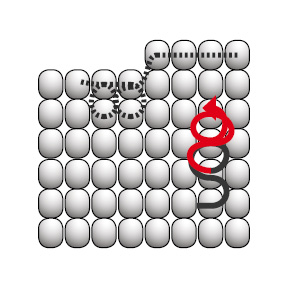
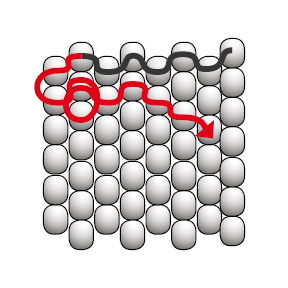
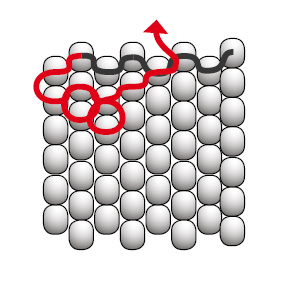
| Weave the thread through beads or between beads toward the body of the project. Aim for an area away from the edge and within a few rows of where you left off. |
 |
 |
 |
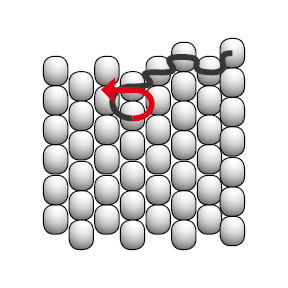
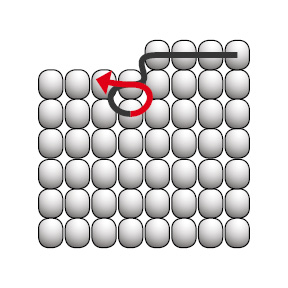
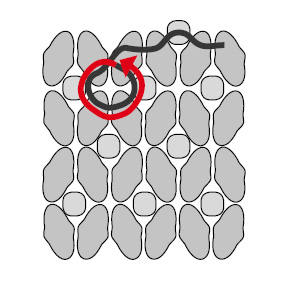
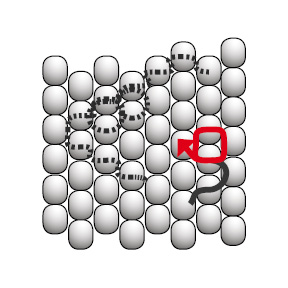
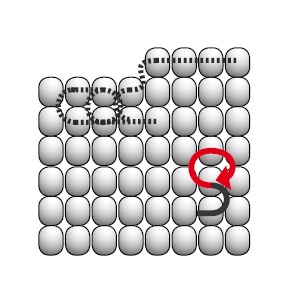
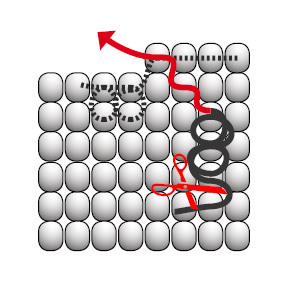
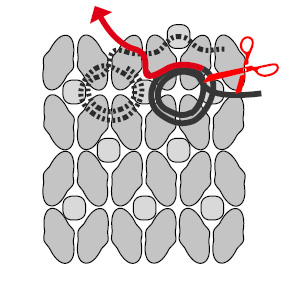
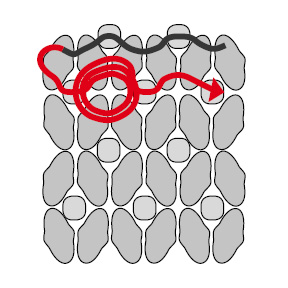
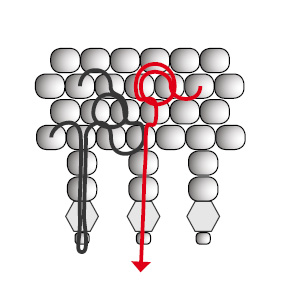
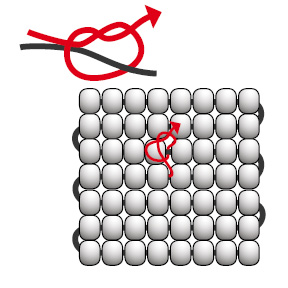
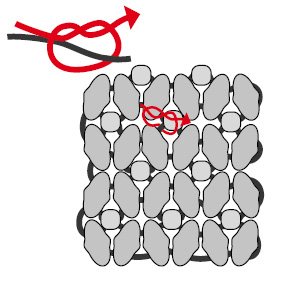
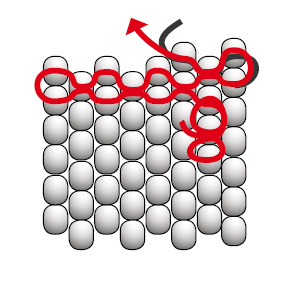
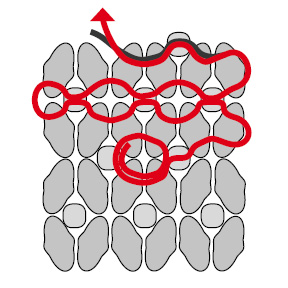
| Circle the thread through the beads. Switching up the direction of the thread helps to lock the thread in place. The exact placement and direction really doesn't matter. The key is to keep the threads hidden as you proceed. |
 |
 |
 |
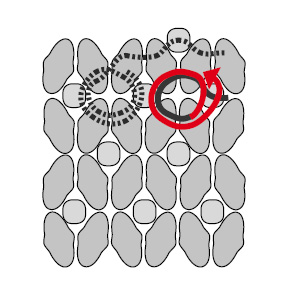
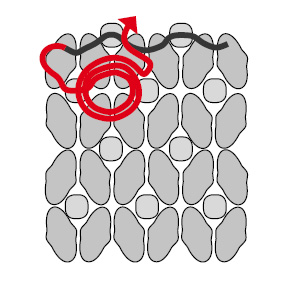
| Circle again in the same place or move over a few beads first. This will ensure the thread is well secured. |
 |
 |
 |
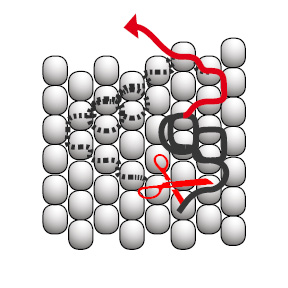
| Weave the tail through a few beads and then trim. |
 |
 |
 |
I've tied off my thread, now how do I add a new one?
You will add a new thread in the same manner, by weaving the thread into the body of the project and then weaving it to the bead where you left off. All of the same rules apply. See the diagrams below.
| |
Peyote Stitch |
Loom or Square Stitch |
Two-Hole beads |
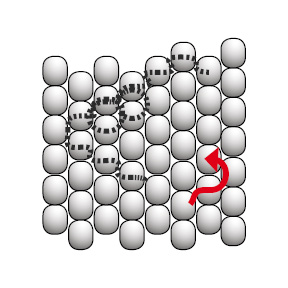
| Insert the needle into a bead somewhere within the body of the weave. Try to choose an area that you have not used for tying off. As with ending a thread, this can be done anywhere within a few rows of where you left off. |
 |
 |
 |
| Circle the thread through the beads. |
 |
 |
 |
| Circle again. You can test the thread by pulling on it. If it doesn't move it is secure. If it gives, switch direction again and form another circle. Sometimes one circle is enough. |
 |
 |
 |
| Then, work the thread through the weave to get to where you left off. |
 |
 |
 |
What do I do with the tails of thread when I'm finished?
You will tie them off the same way or you can use the tails for adding closures such as buttons and loops.
| |
Peyote Stitch |
Loom or Square Stitch |
Two-Hole beads |
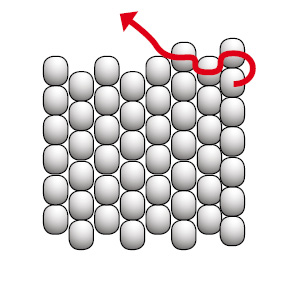
| At the end of the project, you will exit the last bead and then go back into the weave from an outside edge. Weave and circle to secure. Trim the ends. |
 |
 |
 |
Loops and Buttons
| If you intend on adding a closure of some kind or further embellishment, secure the end as usual by weaving and circling, but then weave the thread to the new position as desired. |
 |
 |
 |
Fringe
| Fringe is done in the same manner. It is most secure if the thread is woven in the body of the project, rather than the fringe itself. |
 |
To knot or not
In general, the weaving method for tying off and adding thread is very secure and knots are not necessary. But there are some occasions where knots are a good idea. For example, if the bead hole sizes you are working with are a loose fit on the threads, the weaving may work its way out of the beads. See the diagrams below to learn how to add knots.
| |
Peyote Stitch |
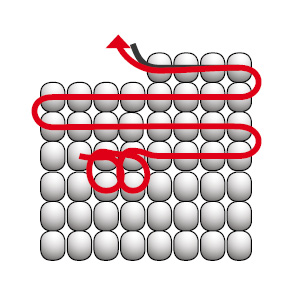
Loom or Square Stitch |
Two-Hole beads |
| Weave the thread to a position in the body of the project as shown before, then tie a half knot around an existing thread in the weave. You can repeat if necessary. Weave the tail through some beads and then trim. |
.jpg?sfvrsn=2) |
 |
 |
What if my thread breaks and it is too short to weave back into the project?
| |
Peyote Stitch |
Loom or Square Stitch |
Two-Hole beads |
| If your thread breaks and it is too short to weave or knot into the project, leave it where it is. |
 |
 |
 |
| Add a new thread a few rows from the end, then weave this new thread through the last few rows of beads to secure them. You can tie a knot here and there if you like. Then continue weaving with the new thread. Trim the old one after you have a few new rows of beads secured. |
 |
 |
 |
With these basic steps you will be able to work with thread in any bead weaving project. Remember, the location of the thread path doesn't need to match our examples exactly. Follow these guidelines to do what feels right for your project. Pretty soon, you will be a natural at thread management.