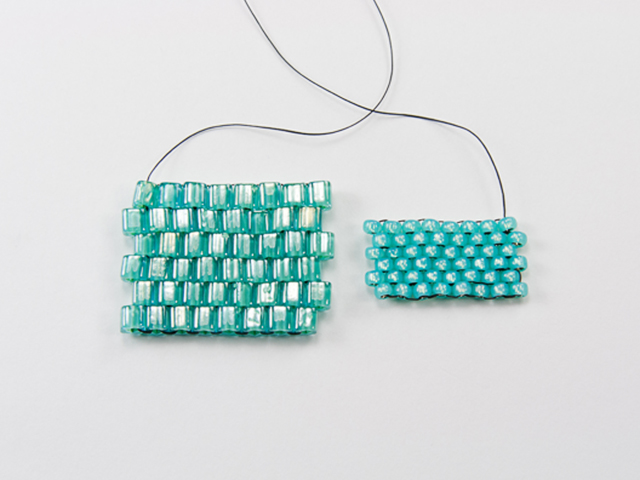
Brick stitch is a bit stiffer than peyote, making it ideal for use in earring designs and small pins.
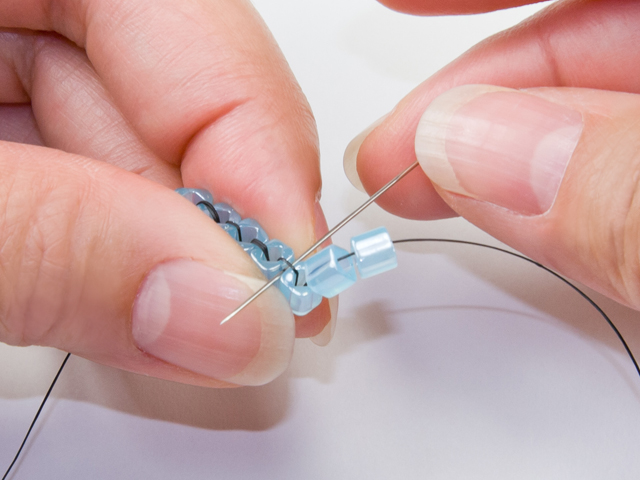
A brick stitch is similar to a peyote stitch, but turned sideways. This technique is a bit stiffer than peyote, making it ideal for use in earring designs and small pins. A brick stitch is called such because of the off-set rows made by the beads, resembling a brick wall. The beginning of a brick stitch is made by sewing a series of beads that lay side-by-side, in a technique called the ladder stitch. Layers are added to this base row by sewing through the stitches holding the layer below together. The result is an off-set pattern, or basic brick stitch. First, create a ladder stitch for the base row. Make sure your thread is exiting out of the top of your last bead. If not, simply rotate your pattern so it is. For a PDF Diagram of Brick Stitch techniques, click here.
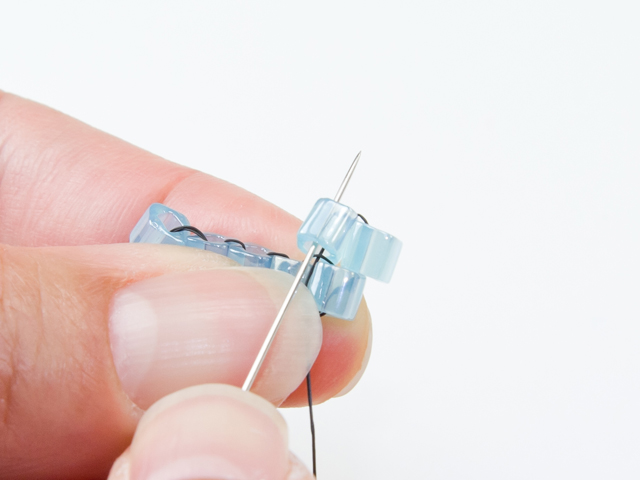
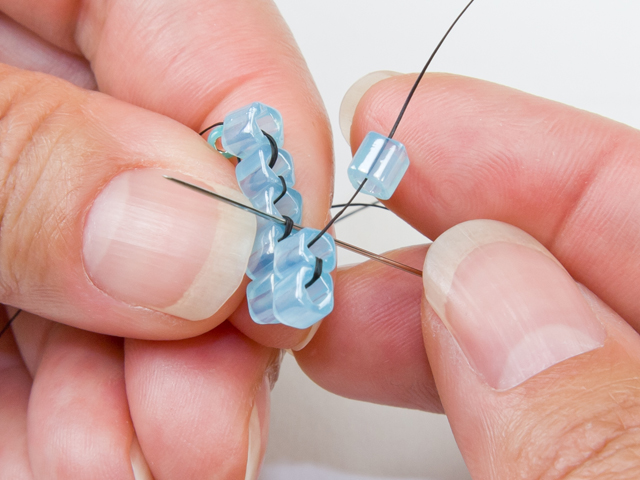
Pick up two beads and move the needle under the exposed loop between the first and second base row beads, moving from back to front. Remember, you will always string 2 beads at the start of each new row.
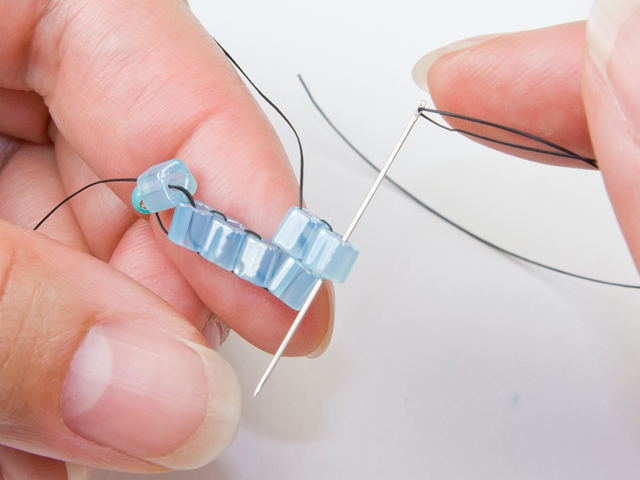
Bring the needle up through the second added bead.
Then, bring it down through the first added bead.
Come back up through the second bead once more.
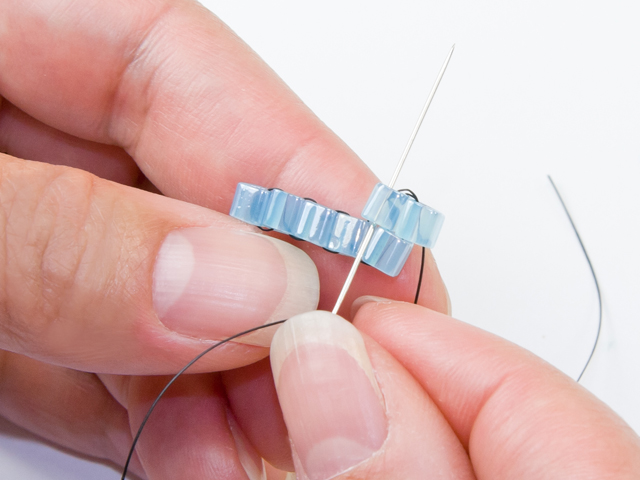
Pick up one more bead. Go under the next closest exposed loop, moving from back to front.
Go back through the added bead (the one from the previous step). Pick up one bead and repeat steps five through six until you reach the end of the row.
Adding Another Row
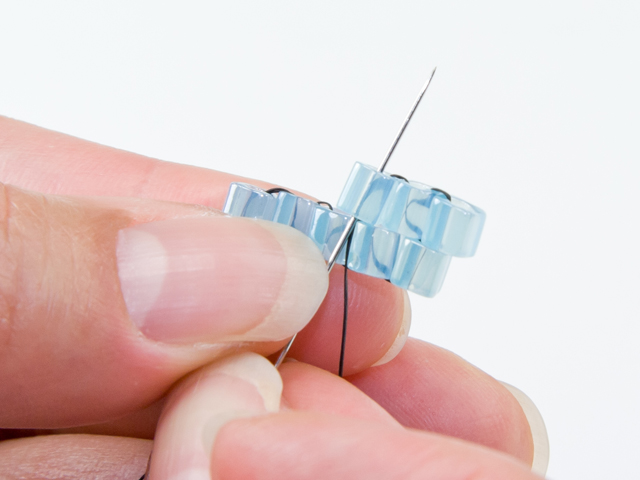
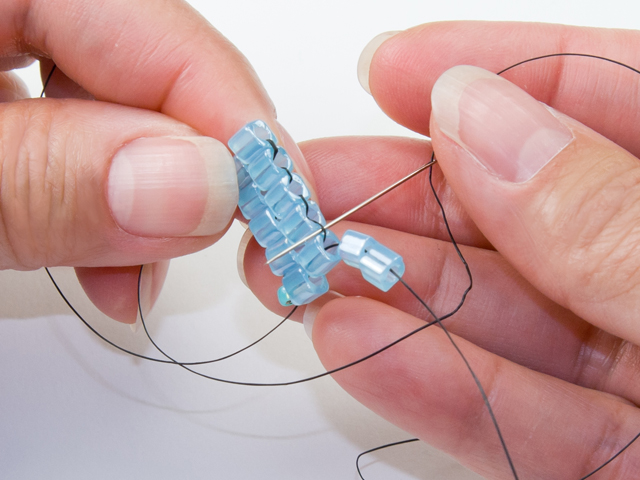
You may find it easier to constantly turn the pattern so you are always working from right to left. Once you reach the end of a row, go back through the last bead. Make sure your thread is exiting out of the top of your last bead. Pick up 2 beads and then move the needle under the exposed loop between the first and second base row beads, moving from back to front, just as you did in step one. Then repeat steps two through six.
Add all available items to your cart at once or edit the quantities below.
Any items with quantities lower than stated minimums will default to the minimum in your cart.
Nice choice! All or most of the products needed for this project are shown
below with quantities. Sometimes we sell out of components and aren’t able to order more from
the manufacturer (we know, it is very disappointing to us, too). Use the opportunity to mix up
the design and make it yours by substituting similar products or altering the entire color
scheme—it’s up to you!
Please wait while we add the products to your cart.
How to Make a Basic Brick Stitch
Mastering Brick Stitch
designed byArtbeads
Skill LevelBeginner
TechniqueSeed-Beading
Time1-3 Hours
Brick stitch is a bit stiffer than peyote, making it ideal for use in earring designs and small pins.
A brick stitch is similar to a peyote stitch, but turned sideways. This technique is a bit stiffer than peyote, making it ideal for use in earring designs and small pins. A brick stitch is called such because of the off-set rows made by the beads, resembling a brick wall. The beginning of a brick stitch is made by sewing a series of beads that lay side-by-side, in a technique called the ladder stitch. Layers are added to this base row by sewing through the stitches holding the layer below together. The result is an off-set pattern, or basic brick stitch. First, create a ladder stitch for the base row. Make sure your thread is exiting out of the top of your last bead. If not, simply rotate your pattern so it is. For a PDF Diagram of Brick Stitch techniques, click here.
Supplies
The BeadSmith 2-Inch 12 Long English Beading Needles 4-Pack
Code NEED-05
$8.99
×1
KO Nylon Japanese Beading Thread, Black (55-Yard Spool)
Code STRNG-0116
$7.99
×1
Step-by-Step Instructions
Pick up two beads and move the needle under the exposed loop between the first and second base row beads, moving from back to front. Remember, you will always string 2 beads at the start of each new row.
Bring the needle up through the second added bead.
Then, bring it down through the first added bead.
Come back up through the second bead once more.
Pick up one more bead. Go under the next closest exposed loop, moving from back to front.
Go back through the added bead (the one from the previous step). Pick up one bead and repeat steps five through six until you reach the end of the row.
Adding Another Row
You may find it easier to constantly turn the pattern so you are always working from right to left. Once you reach the end of a row, go back through the last bead. Make sure your thread is exiting out of the top of your last bead. Pick up 2 beads and then move the needle under the exposed loop between the first and second base row beads, moving from back to front, just as you did in step one. Then repeat steps two through six.


 A brick stitch is similar to a peyote stitch, but turned sideways. This technique is a bit stiffer than peyote, making it ideal for use in earring designs and small pins. A brick stitch is called such because of the off-set rows made by the beads, resembling a brick wall. The beginning of a brick stitch is made by sewing a series of beads that lay side-by-side, in a technique called the