These brick stitch pieces give me serious wanderlust! I just want to travel when I wear them.
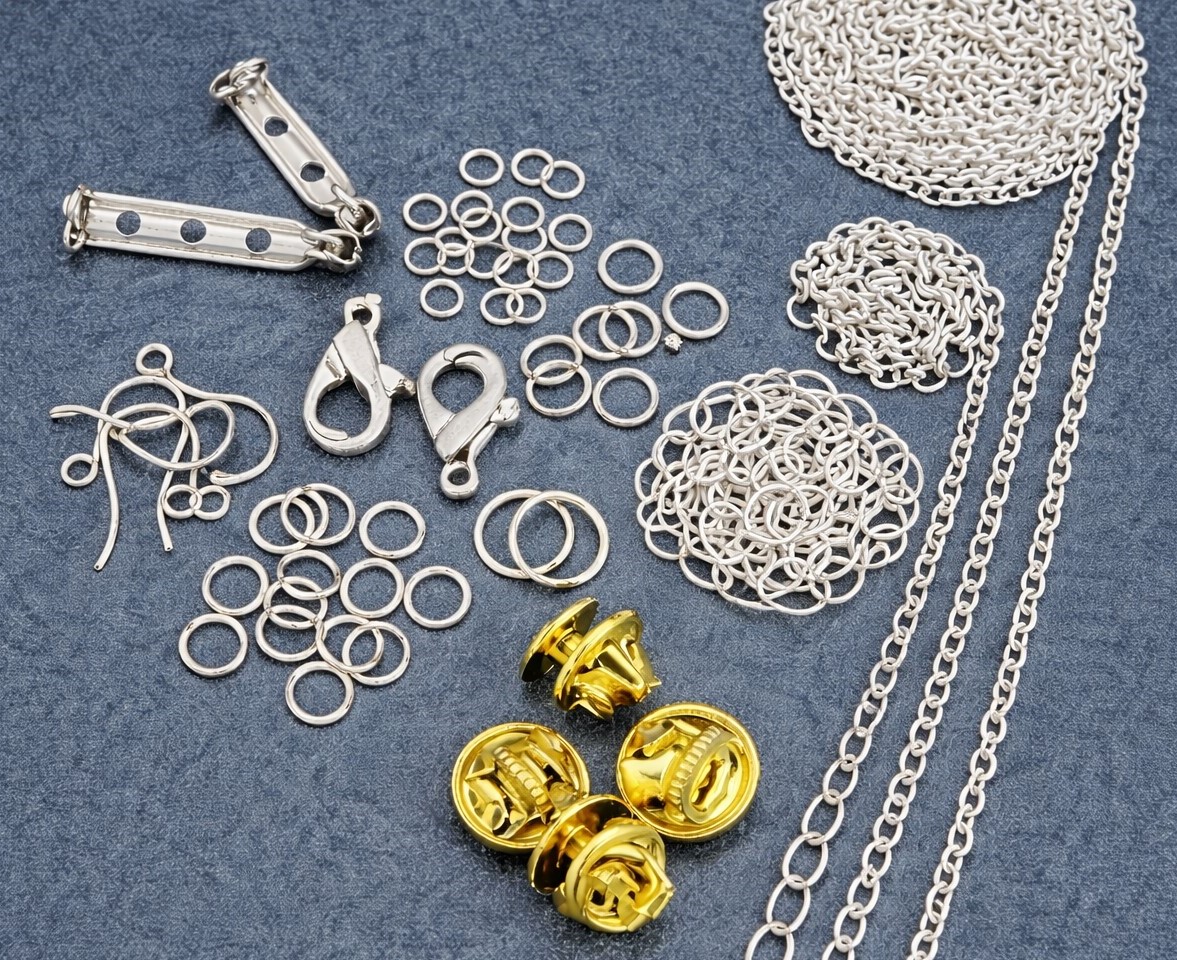
There are so many ways to incorporate cute little brick stitch patterns into your jewelry designs. With our findings kit, you will have the perfect components to easily add your next brick stitch piece to fun jewelry like this set. Cheri made a cute bracelet and key fob with the findings kit, and she had plenty of findings left over to make other fun looks. Take a look at the related tutorials below to see what else she made and make sure to watch this Artbeads Cafe episode to learn more about the findings kit.
Create a brick stitch diamond shape using the PDF Diagram below. You will be increasing and decreasing the stitch through the rows. Start with a ladder stitch near the bottom of the shape (row 1 on the PDF Diagram) and work your way up. The row numbers and arrows on the diagram indicate which direction you are stitching for each row. Then, weave your thread (or use your tail) back to row 1 and add rows 14-19 to the bottom of your shape (if you have your PDF Diagram printed out, turn it upside down once you're ready to work on these rows).
Once you have a diamond stitched, make sure the thread is coming out of one of the beads in row 19. Loop the thread around a small jump ring from the findings kit and go back through the same seed bead in the row, as shown in the PDF Diagram. Bring your thread up through the next bead in the row. Loop around the jump ring again and go back down through the same bead. Loop around the jump ring in this manner several times to strengthen. Then, add a jump ring to the other end of the shape (row 13). Finish and secure your threads.
Open the jump ring on one end of your bracelet focal and attach a 2 ¼-inch length of chain from the findings kit. Close the jump ring. Repeat on the other end of the bracelet focal. Then, attach a clasp from the findings kit to one end using a small jump ring. Attach a larger jump ring to the other end of the bracelet using a small jump ring.
Open the jump ring at the bottom of your key fob focal and attach the small periwinkle tassel with silver cap. Close the jump ring. Link three large jump rings from the findings kit together like a chain and attach them to the jump ring at the top of your key fob focal. Attach a clasp from the findings kit to the last jump ring at the top of your key fob focal.
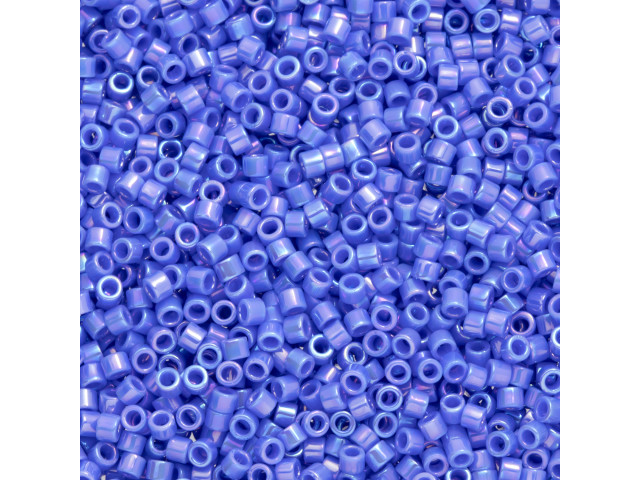
List of Components Artbeads Assorted Brick Stitch (And More) Findings Kit (JEWELRYKIT-0001, qty 1) TOHO Aiko 11/0 Opaque Matte Lt Beige Rainbow Precision Cylinder Seed Beads, 4g Pack (AIKO-409F, qty 1) TOHO Aiko 11/0 Metallic Chrome Silver Precision Cylinder Seed Beads, 4g Pack (AIKO-714, qty 1) TOHO Aiko 11/0 Opaque Periwinkle Rainbow Precision Cylinder Seed Beads, 4g Pack (AIKO-408L, qty 1) Small Periwinkle Tassel with Silver Cap (FIND-2151, qty 1) TOHO Aiko 11/0 Raspberry Gold Luster Precision Cylinder Seed Beads, 4g Pack (AIKO-332, qty 1)
Add all available items to your cart at once or edit the quantities below.
Any items with quantities lower than stated minimums will default to the minimum in your cart.
Nice choice! All or most of the products needed for this project are shown
below with quantities. Sometimes we sell out of components and aren’t able to order more from
the manufacturer (we know, it is very disappointing to us, too). Use the opportunity to mix up
the design and make it yours by substituting similar products or altering the entire color
scheme—it’s up to you!
Please wait while we add the products to your cart.
Going Places
Seed Bead Brick Stitch Diamond Bracelet and Key Fob
designed byCheri Carlson
Skill LevelBeginner
TechniqueSeed-Beading
Time4-6 Hours
Approximate Size6 Inches; 3 Inches
These brick stitch pieces give me serious wanderlust! I just want to travel when I wear them.
There are so many ways to incorporate cute little brick stitch patterns into your jewelry designs. With our findings kit, you will have the perfect components to easily add your next brick stitch piece to fun jewelry like this set. Cheri made a cute bracelet and key fob with the findings kit, and she had plenty of findings left over to make other fun looks. Take a look at the related tutorials below to see what else she made and make sure to watch this Artbeads Cafe episode to learn more about the findings kit.
Create a brick stitch diamond shape using the PDF Diagram below. You will be increasing and decreasing the stitch through the rows. Start with a ladder stitch near the bottom of the shape (row 1 on the PDF Diagram) and work your way up. The row numbers and arrows on the diagram indicate which direction you are stitching for each row. Then, weave your thread (or use your tail) back to row 1 and add rows 14-19 to the bottom of your shape (if you have your PDF Diagram printed out, turn it upside down once you're ready to work on these rows).
Once you have a diamond stitched, make sure the thread is coming out of one of the beads in row 19. Loop the thread around a small jump ring from the findings kit and go back through the same seed bead in the row, as shown in the PDF Diagram. Bring your thread up through the next bead in the row. Loop around the jump ring again and go back down through the same bead. Loop around the jump ring in this manner several times to strengthen. Then, add a jump ring to the other end of the shape (row 13). Finish and secure your threads.
Open the jump ring on one end of your bracelet focal and attach a 2 ¼-inch length of chain from the findings kit. Close the jump ring. Repeat on the other end of the bracelet focal. Then, attach a clasp from the findings kit to one end using a small jump ring. Attach a larger jump ring to the other end of the bracelet using a small jump ring.
Open the jump ring at the bottom of your key fob focal and attach the small periwinkle tassel with silver cap. Close the jump ring. Link three large jump rings from the findings kit together like a chain and attach them to the jump ring at the top of your key fob focal. Attach a clasp from the findings kit to the last jump ring at the top of your key fob focal.
List of Components Artbeads Assorted Brick Stitch (And More) Findings Kit (JEWELRYKIT-0001, qty 1) TOHO Aiko 11/0 Opaque Matte Lt Beige Rainbow Precision Cylinder Seed Beads, 4g Pack (AIKO-409F, qty 1) TOHO Aiko 11/0 Metallic Chrome Silver Precision Cylinder Seed Beads, 4g Pack (AIKO-714, qty 1) TOHO Aiko 11/0 Opaque Periwinkle Rainbow Precision Cylinder Seed Beads, 4g Pack (AIKO-408L, qty 1) Small Periwinkle Tassel with Silver Cap (FIND-2151, qty 1) TOHO Aiko 11/0 Raspberry Gold Luster Precision Cylinder Seed Beads, 4g Pack (AIKO-332, qty 1)