Start an even-count 3-drop peyote stitch bracelet by stringing 3 opaque light beige beads, 3 golden fleece beads, 3 beige beads, 3 golden fleece beads, and 3 beige beads onto your thread. These beads will become the first two rows of your bracelet. To learn how to create an even-count 3-drop peyote stitch, take a look at our video tutorial for 2-drop peyote stitch. The method is the same, but you use three beads for each stitch instead of two.
Continue the rows to create a patchwork look. Match the color pattern of the first rows for the next two rows in each square to create rows of color.
The next row above your golden fleece beads will be the bronze seed bead color. The next color above your light beige beads will be the golden fleece color. Match this color pattern for the next two rows in each square.
The next row above your bronze beads will be the golden fleece color. The next color above your golden fleece beads will be the light beige color. Match this color pattern for the next two rows in each square.
Repeat steps 3 and 4 until your bracelet is the desired length, keeping in mind the clasp will add about 2 1/4 inches of length. Our peyote band is 4 1/2 inches long.
Position your thread or start a new thread if needed so that it is coming out the last bead on one edge of your bracelet. Add a 15/0 seed bead, a Demi Round, a 15/0 seed bead, a Demi Round, and a 15/0 seed bead. Bring your thread down through the next seed bead over on the edge of the bracelet. Bring your thread up through the next seed bead over.
Repeat the previous step for the length of the edge of this bracelet. Weave the thread so that it is coming out of the last bead on the other edge of the bracelet and add a picot edge in the same fashion on this edge.
Stitch a Cymbal gold-plated ending onto one end of your bracelet. We lined up the end bead hole of the finding to the end bead on the last row of our bracelet and looped the thread around both several times. Then, weave your thread so that it is coming out of the 5th bead over in the last row, or out of the bead closest to the next bead hole on the finding. Attach the bead and the hole of the finding. Weave so that the thread is coming out of the 5th bead over from the last bead and attach to the finding. For the last hole, attach to the first 15/0 bead in the picot edge. Repeat this step on the other end of the bracelet.
Attach each half of the clasp to each end of the bracelet using a jump ring for each.
Note: Please make sure to double check our list of components with what's actually in stock on the supplies tab. We've also added alternate supply codes to try if the original ones are not in stock. TOHO Round Bead 11/0 PermaFinish Matte Galvanized Golden Fleece 2.5-Inch Tube (TBRD11-PF592F, qty 1) TOHO 11/0 PermaFinish Matte Galvanized Medal Bronze Round Bead 2.5-Inch tube (TBRDT11-PF594F, qty 1) (Or, shop all TOHO 11/0 Round Beads) TOHO Bead Round 11/0 Opaque Light Beige, 2.5-Inch Tube (TBRD11-51, qty 1) TOHO Demi Round Bead 11/0 Matte-Color Mauve Mocha approx. 7.8g Tube (TBDMR11-703C, qty 1) TOHO Bead Round 15/0 Silver-Lined Medium Gold 2.5-Inch Tube (TBRD15-22B, qty 1) Cymbal Lakos IV 24K Gold-Plated Bead Ending for 8/0 Miyuki Round, Bag of 4 (CYM0071, qty 1) (Or, try CYM0182) Gold-Plated Ball Clasp with Crystals (CLASP-0842, qty 1) 6mm Satin Hamilton Gold-Plated 21 Gauge Open Jump Ring (FIND-0444, qty 2) TOHO One-G Beading Thread Light Yellow 50-Yard Spool (STRNG-0409, qty 1) Tulip Beading Needle No 12 (2 pack) (NEED-21, qty 1)
Add all available items to your cart at once or edit the quantities below.
Any items with quantities lower than stated minimums will default to the minimum in your cart.
Nice choice! All or most of the products needed for this project are shown
below with quantities. Sometimes we sell out of components and aren’t able to order more from
the manufacturer (we know, it is very disappointing to us, too). Use the opportunity to mix up
the design and make it yours by substituting similar products or altering the entire color
scheme—it’s up to you!
Please wait while we add the products to your cart.
Warm Welcome Bracelet
3-Drop Peyote Stitch Seed Bead Bracelet with Cymbal Findings
designed byBecky Dahl
Skill LevelBeginner
TechniqueSeed-Beading
Time4-6 Hours
Approximate Size6 1/4 Inches
I love how the 3-drop peyote stitch adds even more texture to my buffalo plaid bead pattern.
This bracelet is a beautiful way to try 3-Drop Peyote Stitch for yourself. Learn more about this seed beading technique with our video.
Supplies
TOHO One-G Beading Thread Light Yellow 50-Yard Spool
Code STRNG-0409
$8.18
$10.23
×1
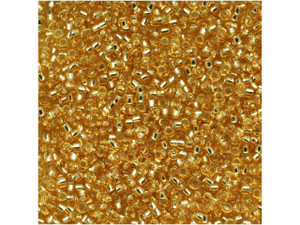
TOHO Bead Round 11/0 Opaque Light Beige, 2.5-Inch Tube
Code TBRD11-51
$1.75
$2.19
×1
TOHO Bead Round 15/0 Silver-Lined Medium Gold 2.5-Inch Tube
Code TBRD15-22B
$2.22
$2.96
×1
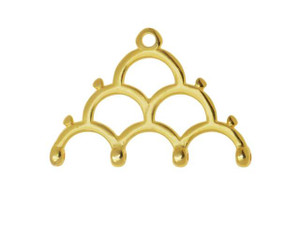
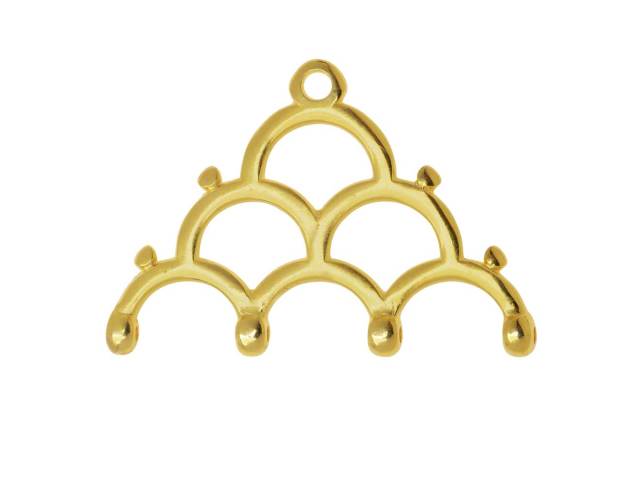
Cymbal Lakos IV 24K Gold-Plated Bead Ending for 8/0 Miyuki Round (2 Pieces)
Code CYM0071
$6.91
$8.99
×1
Tulip Beading Needle No 12 (2 Piece Pack)
Code NEED-21
$14.39
$17.99
×1
Step-by-Step Instructions
Start an even-count 3-drop peyote stitch bracelet by stringing 3 opaque light beige beads, 3 golden fleece beads, 3 beige beads, 3 golden fleece beads, and 3 beige beads onto your thread. These beads will become the first two rows of your bracelet. To learn how to create an even-count 3-drop peyote stitch, take a look at our video tutorial for 2-drop peyote stitch. The method is the same, but you use three beads for each stitch instead of two.
Continue the rows to create a patchwork look. Match the color pattern of the first rows for the next two rows in each square to create rows of color.
The next row above your golden fleece beads will be the bronze seed bead color. The next color above your light beige beads will be the golden fleece color. Match this color pattern for the next two rows in each square.
The next row above your bronze beads will be the golden fleece color. The next color above your golden fleece beads will be the light beige color. Match this color pattern for the next two rows in each square.
Repeat steps 3 and 4 until your bracelet is the desired length, keeping in mind the clasp will add about 2 1/4 inches of length. Our peyote band is 4 1/2 inches long.
Position your thread or start a new thread if needed so that it is coming out the last bead on one edge of your bracelet. Add a 15/0 seed bead, a Demi Round, a 15/0 seed bead, a Demi Round, and a 15/0 seed bead. Bring your thread down through the next seed bead over on the edge of the bracelet. Bring your thread up through the next seed bead over.
Repeat the previous step for the length of the edge of this bracelet. Weave the thread so that it is coming out of the last bead on the other edge of the bracelet and add a picot edge in the same fashion on this edge.
Stitch a Cymbal gold-plated ending onto one end of your bracelet. We lined up the end bead hole of the finding to the end bead on the last row of our bracelet and looped the thread around both several times. Then, weave your thread so that it is coming out of the 5th bead over in the last row, or out of the bead closest to the next bead hole on the finding. Attach the bead and the hole of the finding. Weave so that the thread is coming out of the 5th bead over from the last bead and attach to the finding. For the last hole, attach to the first 15/0 bead in the picot edge. Repeat this step on the other end of the bracelet.
Attach each half of the clasp to each end of the bracelet using a jump ring for each.
Note: Please make sure to double check our list of components with what's actually in stock on the supplies tab. We've also added alternate supply codes to try if the original ones are not in stock. TOHO Round Bead 11/0 PermaFinish Matte Galvanized Golden Fleece 2.5-Inch Tube (TBRD11-PF592F, qty 1) TOHO 11/0 PermaFinish Matte Galvanized Medal Bronze Round Bead 2.5-Inch tube (TBRDT11-PF594F, qty 1) (Or, shop all TOHO 11/0 Round Beads) TOHO Bead Round 11/0 Opaque Light Beige, 2.5-Inch Tube (TBRD11-51, qty 1) TOHO Demi Round Bead 11/0 Matte-Color Mauve Mocha approx. 7.8g Tube (TBDMR11-703C, qty 1) TOHO Bead Round 15/0 Silver-Lined Medium Gold 2.5-Inch Tube (TBRD15-22B, qty 1) Cymbal Lakos IV 24K Gold-Plated Bead Ending for 8/0 Miyuki Round, Bag of 4 (CYM0071, qty 1) (Or, try CYM0182) Gold-Plated Ball Clasp with Crystals (CLASP-0842, qty 1) 6mm Satin Hamilton Gold-Plated 21 Gauge Open Jump Ring (FIND-0444, qty 2) TOHO One-G Beading Thread Light Yellow 50-Yard Spool (STRNG-0409, qty 1) Tulip Beading Needle No 12 (2 pack) (NEED-21, qty 1)