Icy colors from an Artbeads Designer Blend come together in this right angle weave design to create a glistening look of a Frozen Pond. The wintery blue colors and brilliant sparkle will glide across your wrist in the most fashionable way
Using a length of FireLine and a beading a needle, add the following beads to the thread:
One Miyuki 15/0 round seed bead in Duracoat galvanized silver
One bicone from the 4mm Crystal Mix Sapphire Ice Designer Blend
Two seed beads
One pearl from the Designer Blend
Two seed beads
One bicone
Two seed beads
One bicone
One seed bead
Make a loop with these beads by bringing the needle back through the first seed bead. You are going to create a right angle weave (RAW). For help with this technique, see the Right Angle Weave Diagram PDF. Keep in mind that one seed bead, one crystal bead, and one seed bead count as one bead in the weave. Continue through the beads in the loop until you pass through the seed bead at the end of the pearl.
Pass through the existing section of seed bead, pearl, and seed bead from the previous loop to make another loop. Then, go through the beads of this loop until you are exiting out of the seed bead after the middle bicone in the loop.
Add the following beads to your thread:
One seed bead
One bicone
Two seed beads
One pearl
Two seed beads
One bicone
One seed bead
Pass through the existing section of seed bead, middle bicone, and seed bead from the previous loop to make another loop. Go through the beads of this loop until you are exiting out of the seed bead after the pearl in the loop. Repeat steps two and three until your row is the desired length for a bracelet, keeping in mind the clasp will add about one inch of length.
Add another row of right angle weave to your bracelet, referring to steps 6-9 of the PDF diagram.
When you've finished your second row, make sure your thread is exiting out of one of the seed beads at the center of the end of the two rows. This is where you will add your clasp. Add three seed beads to the thread, followed by the loop component of the JBB sterling silver 16mm spiral toggle clasp. Add three more seed beads and bring your thread back down through the other seed bead at the center of the end of the rows. Go through the corresponding loop and back up through the seed beads and clasp to reinforce. Repeat to strengthen your clasp. Finish your thread.
Start a new thread on the other end of your bracelet. Repeat step five to add the bar component of your clasp, adjusting the amount of seed beads on each side of the bar to make sure it fits through the loop. We used six seed beads on either side of the bar.
List of Components: 4mm Crystal Mix Sapphire Ice Designer Blend (ADB0444, qty 2) OR PRESTIGE 5328 4mm Bicone Bead Light Sapphire AB (5328-SAPLTAB4, QTY 60) and PRESTIGE 5328 4mm Bicone Bead Light Sapphire (5328-SAPLT4, QTY60) and PRESTIGE 5810 4mm Round Crystal Pearl Dark Lapis (5810-DLA4, QTY 30) Miyuki 15/0 Round Seed Beads - Duracoat Galvanized Silver 22g Vial (MR15-4201, qty 1) JBB Sterling Silver 16mm Spiral Toggle Clasp (ISCL-0048, qty 1)
Add all available items to your cart at once or edit the quantities below.
Any items with quantities lower than stated minimums will default to the minimum in your cart.
Nice choice! All or most of the products needed for this project are shown
below with quantities. Sometimes we sell out of components and aren’t able to order more from
the manufacturer (we know, it is very disappointing to us, too). Use the opportunity to mix up
the design and make it yours by substituting similar products or altering the entire color
scheme—it’s up to you!
Please wait while we add the products to your cart.
Frozen Pond
Sapphire Ice Designer Blend RAW Bracelet
designed byCynthia Kimura
Skill LevelIntermediate
Time4-6 Hours
Approximate Size7 3/4 Inches
Crystals look gorgeous within Right Angle Weave.
Icy colors from an Artbeads Designer Blend come together in this right angle weave design to create a glistening look of a Frozen Pond. The wintery blue colors and brilliant sparkle will glide across your wrist in the most fashionable way
Supplies
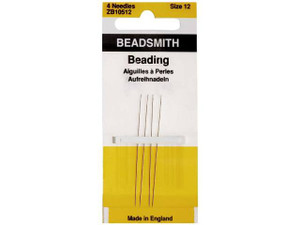
The BeadSmith 2-Inch 12 Long English Beading Needles 4-Pack
Code NEED-05
$7.19
$8.99
×1
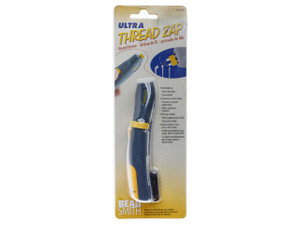
The BeadSmith Ultra Thread Zap Thread Burner (Battery Operated)
Code TOOL-0211
$19.99
$24.99
×1
JBB Sterling Silver 16mm Spiral Toggle Clasp
Code ISCL-0048
$23.21
$29.01
×1
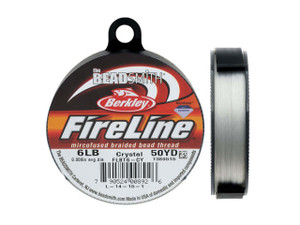
The BeadSmith Crystal Clear FireLine - 50 Yards (6-Pound Test)
Code FL06CR50
$13.59
$16.99
×1
Step-by-Step Instructions
Using a length of FireLine and a beading a needle, add the following beads to the thread:
One Miyuki 15/0 round seed bead in Duracoat galvanized silver
One bicone from the 4mm Crystal Mix Sapphire Ice Designer Blend
Two seed beads
One pearl from the Designer Blend
Two seed beads
One bicone
Two seed beads
One bicone
One seed bead
Make a loop with these beads by bringing the needle back through the first seed bead. You are going to create a right angle weave (RAW). For help with this technique, see the Right Angle Weave Diagram PDF. Keep in mind that one seed bead, one crystal bead, and one seed bead count as one bead in the weave. Continue through the beads in the loop until you pass through the seed bead at the end of the pearl.
Pass through the existing section of seed bead, pearl, and seed bead from the previous loop to make another loop. Then, go through the beads of this loop until you are exiting out of the seed bead after the middle bicone in the loop.
Add the following beads to your thread:
One seed bead
One bicone
Two seed beads
One pearl
Two seed beads
One bicone
One seed bead
Pass through the existing section of seed bead, middle bicone, and seed bead from the previous loop to make another loop. Go through the beads of this loop until you are exiting out of the seed bead after the pearl in the loop. Repeat steps two and three until your row is the desired length for a bracelet, keeping in mind the clasp will add about one inch of length.
Add another row of right angle weave to your bracelet, referring to steps 6-9 of the PDF diagram.
When you've finished your second row, make sure your thread is exiting out of one of the seed beads at the center of the end of the two rows. This is where you will add your clasp. Add three seed beads to the thread, followed by the loop component of the JBB sterling silver 16mm spiral toggle clasp. Add three more seed beads and bring your thread back down through the other seed bead at the center of the end of the rows. Go through the corresponding loop and back up through the seed beads and clasp to reinforce. Repeat to strengthen your clasp. Finish your thread.
Start a new thread on the other end of your bracelet. Repeat step five to add the bar component of your clasp, adjusting the amount of seed beads on each side of the bar to make sure it fits through the loop. We used six seed beads on either side of the bar.
List of Components: 4mm Crystal Mix Sapphire Ice Designer Blend (ADB0444, qty 2) OR PRESTIGE 5328 4mm Bicone Bead Light Sapphire AB (5328-SAPLTAB4, QTY 60) and PRESTIGE 5328 4mm Bicone Bead Light Sapphire (5328-SAPLT4, QTY60) and PRESTIGE 5810 4mm Round Crystal Pearl Dark Lapis (5810-DLA4, QTY 30) Miyuki 15/0 Round Seed Beads - Duracoat Galvanized Silver 22g Vial (MR15-4201, qty 1) JBB Sterling Silver 16mm Spiral Toggle Clasp (ISCL-0048, qty 1)