Create a bead embroidered masterpiece with this necklace tutorial. Make sure to also check out our Guide to Bead Embroidery for even more help with bead embroidery techniques.
Note: Please make sure to double check our list of components with what's actually in stock on the supplies tab. We've also added alternate supply codes to try if the original ones are not in stock.Blue Bird with Flower Hand-Painted Red Agate Rectangle Bead (BEAD4779, qty 1) (Or, try BEAD4776)
The BeadSmith 4.25x5.5-Inch White Bead Backing (EMB-0022, qty 1)
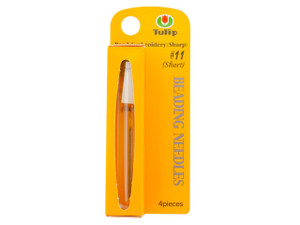
Tulip Bead Embroidery Needles Sharp : #11 Short (T-TBN-014e, qty 1)
KO Nylon Japanese Beading Thread, Gold (55-Yard Spool) (STRNG-0108, qty 1)
TOHO Bead Round 8/0 Ceylon Butter Yellow 2.5-Inch Tube (TBRD8-148, qty 1) (Or, shop all
TOHO 8/0 Round Seed Beads)
TOHO Bead Round 8/0 Galvanized Matte Starlight PermaFinish 2.5-Inch Tube (TBRD8-PF557F, qty 1)
TOHO Bead Round 8/0 Semi-Glazed Dark Red AB 2.5-Inch Tube (TBRD8-2639F, qty 1)
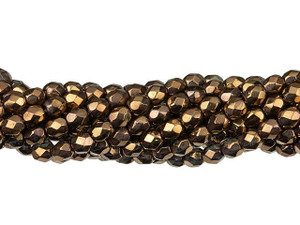
Czech Glass 4mm Patina Olivine Fire-Polish Bead Strand by Starman (CFP-B5023-4, qty 1) (Or, shop all
4mm Fire-Polished Beads)
Czech Glass 4mm Halo Ethereal - Shadows Fire-Polish Bead Strand by Starman (CFP-P29263-4, qty 1)
Czech Glass 4mm Luster Opaque Rose/Gold Topaz Fire-Polish Bead Strand by Starman (CFP-P65491-4, qty 1)
PRESTIGE 5810 4mm Round Crystal Pearl Vintage Gold (5810-VGD4, qty 20) (Or, try 5810-GOLD4)
PRESTIGE 5328 4mm Bicone Bead Light Smoked Topaz (5328-TOSMKLT4, qty 14) (Or, try 5328-LTAM4)
PRESTIGE 5810 5mm Round Crystal Pearl Iridescent Dreamy Blue (5810-IRDB5, qty 2) (Or, try 5810-BLULT5)
PRESTIGE 5810 6mm Round Pearl Crystal Iridescent Red (5810-CIR6, qty 4) (Or, try 5810-BXP6)
5x4.5mm Gold-Plated Flat Cable Chain by the Foot (BTF-0597, qty 2)
Gold-Filled 14K Open Jump Ring 0.030 x .140 inches (0.75 x 3.55mm) (GF-OJR30-B, qty 4)
14K/20 Gold-Filled 3.2mm Crimp Cover (FIND3053, qty 2)
Gold-Filled 14K/20 2 x 2mm Crimp Tube (GF-CRM2, qty 2)
JBB Gold-Plated Pewter Round Toggle Clasp (PG-TOG010, qty 1)
Artbeads Designer Jewelry Wire, 49-Strand .019 30-Feet (9.1 Meters) (ZP49-30F-019, qty 1)