Follow the instructions for making an open back peyote stitch bezel. Use 30-32 11/0 TOHO Treasures to start your first row. Form a circle with the thread and knot in place. Add another row of 11/0 Treasures using the techniques in the tutorial. You will now have three rows.
Add one row of TOHO 15/0 bead rounds to the peyote stitch bezel. This will be the top of the ring bezel. When you get to the end of the row, pinch the circle to form a V and skip adding the last bead. Instead, just run your thread through the next Delica. The V shape will not really hold at this point but don't worry; it will hold better when you come around with the next row of beads.
Add a second row of 15/0 TOHOs. When you get to the V, add a seed bead so that it nestles in the V. Circle through the V if necessary to tighten it up.
Weave your thread (or tie off and add more if necessary) so that it is positioned to the back side of the ring bezel, just to one side of the V point. On this side of the bezel, add a row of 15/0 seed beads, just as you did on the top side.
Place the fancy pear into the bezel, with the shiny side facing out of the top of the bezel. Create another row on the back side of the bezel following this pattern of beads:
Two 15/0 Beads
Four 11/0 beads
Four 15/0 beads
Four 11/0 beads
Two 15/0 beads
Position your thread for the next row and follow this pattern of beads:
Add one 15/0 bead
Skip a bead
Add one 11/0 bead
Skip a bead
Add one 11/0 bead
Add one 15/0 bead
Add a 15/0 bead to the V
Add one 15/0 bead
Add one 11/0 bead
Skip a bead
Add one 11/0 bead
Skip a bead
Add one 15/0 bead
Go back through this row to reinforce. Reinforce the front rows, too.
Position your thread so that it is coming out of the center bead at the bottom of the point of the frame. Then, add these beads for the fringe:
One 15/0 bead
One Demi Round and one 11/0 (repeat three times)
One Demi Round
Three 15/0 Beads
One 11/0, one bugle, and one 11/0
Three 15/0 Beads
One Demi Round and one 11/0 (repeat two times)
One Demi Round
One 15/0, One 11/0, One 15/0
One Crystal
One 15/0
Skip over the last bead added and go back through the rest of the beads in the fringe pattern. Bring your thread back through the same bead you are exiting from, from the other side of the bead.
Position your thread so that it is coming out of one of the beads to one side of the center bead. Then, add these beads for the fringe:
One 15/0 bead
One Demi Round and one 11/0 (repeat two times)
One Demi Round
Three 15/0 Beads
One 11/0, one bugle, and one 11/0
Three 15/0 Beads
One Demi Round and one 11/0 (repeat two times)
One Demi Round
One 15/0, One 11/0, One 15/0
One Crystal
One 15/0
Skip over the last bead added and go back through the rest of the beads in the fringe pattern. Bring your thread back through the same bead you are exiting from, from the other side of the bead.
Position your thread so that it is coming out of the bead to the other side of the center bead and repeat the previous step.
Position your thread at the top of the pear shape and stitch an earwire on. Secure and trim any threads.
Repeat these steps to make the second earring.
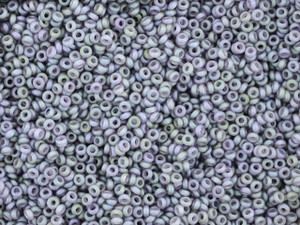
Note: Please make sure to double check our list of components with what's actually in stock on the supplies tab. We've also added alternate supply codes to try if the original ones are not in stock. PRESTIGE 4320 14mm Pear Fancy Stone Crystal Purple Ignite (4320-CPIG14, qty 2) (Or, try 4320-CAB14) TOHO Treasure 11/0 Transparent Frosted Blackberry Gold Luster Seed Bead 2.5-Inch Tube (TTB11-625F, qty 1) (Or, try TTB11-252) TOHO Bead Round 15/0 Matte Metallic Iris Purple 2.5-Inch Tube (TBRD15-85, qty 1) (Or, try TBRD15-461) TOHO Demi Round Bead 11/0 Matte Color Transparent Gold Luster Hydrangea 2.5-Inch Tube (TBDMR11-635F, qty 1) (Or, try TBDMR11-205C) Miyuki 6mm Matte Metallic Dark Raspberry Bugle Beads 5-Inch Tube (BEADS-4022, qty 1) (Or, try BEADS-4040) PRESTIGE 5000 4mm Faceted Round Cyclamen Opal Shimmer (5000-CYOPS4, qty 6) (Or, try 5000-AMYLTS4) TierraCast Sterling Silver Earwire with 3mm Ball and Coil (1 Pair) (SS-1180, qty 1) The BeadSmith Smoke Gray FireLine - 50 Yards (6-Pound Test) (FL06SG50, qty 1) Tulip Beading Needle No 12 (2 pack) (NEED-21, qty 1)
Add all available items to your cart at once or edit the quantities below.
Any items with quantities lower than stated minimums will default to the minimum in your cart.
Nice choice! All or most of the products needed for this project are shown
below with quantities. Sometimes we sell out of components and aren’t able to order more from
the manufacturer (we know, it is very disappointing to us, too). Use the opportunity to mix up
the design and make it yours by substituting similar products or altering the entire color
scheme—it’s up to you!
Please wait while we add the products to your cart.
Ignite Your Style
Purple Seed Bead Fringe Earrings with PRESTIGE Crystal Pear Fancy Stone
designed byBecky Dahl
Skill LevelIntermediate
TechniqueSeed-Beading
Time4-6 Hours
Approximate Size3 Inches
The purple colors in these earrings are so eye-catching!
PRESTIGE Crystal fancy stones create the foundation for these elegant fringe earrings!
Supplies
Miyuki 6mm Matte Metallic Dark Raspberry Bugle Beads 5-Inch Tube
Code BEADS-4022
$13.99
×1
PRESTIGE 4320 14mm Pear Fancy Stone Crystal Purple Ignite - Min Qty 1
Code 4320-CPIG14
$6.99
×2
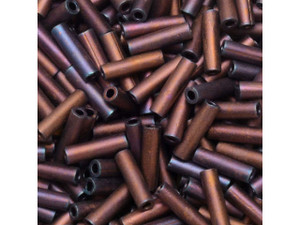
TOHO Demi Round Bead 11/0 Matte Color Transparent Gold Luster Hydrangea 2.5-Inch Tube
Code TBDMR11-635F
$7.99
×1
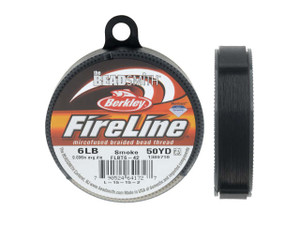
The BeadSmith Smoke Gray FireLine - 50 Yards (6-Pound Test)
Code FL06SG50
$16.99
×1
Tulip Beading Needle No 12 (2 Piece Pack)
Code NEED-21
$17.99
×1
Step-by-Step Instructions
Follow the instructions for making an open back peyote stitch bezel. Use 30-32 11/0 TOHO Treasures to start your first row. Form a circle with the thread and knot in place. Add another row of 11/0 Treasures using the techniques in the tutorial. You will now have three rows.
Add one row of TOHO 15/0 bead rounds to the peyote stitch bezel. This will be the top of the ring bezel. When you get to the end of the row, pinch the circle to form a V and skip adding the last bead. Instead, just run your thread through the next Delica. The V shape will not really hold at this point but don't worry; it will hold better when you come around with the next row of beads.
Add a second row of 15/0 TOHOs. When you get to the V, add a seed bead so that it nestles in the V. Circle through the V if necessary to tighten it up.
Weave your thread (or tie off and add more if necessary) so that it is positioned to the back side of the ring bezel, just to one side of the V point. On this side of the bezel, add a row of 15/0 seed beads, just as you did on the top side.
Place the fancy pear into the bezel, with the shiny side facing out of the top of the bezel. Create another row on the back side of the bezel following this pattern of beads:
Two 15/0 Beads
Four 11/0 beads
Four 15/0 beads
Four 11/0 beads
Two 15/0 beads
Position your thread for the next row and follow this pattern of beads:
Add one 15/0 bead
Skip a bead
Add one 11/0 bead
Skip a bead
Add one 11/0 bead
Add one 15/0 bead
Add a 15/0 bead to the V
Add one 15/0 bead
Add one 11/0 bead
Skip a bead
Add one 11/0 bead
Skip a bead
Add one 15/0 bead
Go back through this row to reinforce. Reinforce the front rows, too.
Position your thread so that it is coming out of the center bead at the bottom of the point of the frame. Then, add these beads for the fringe:
One 15/0 bead
One Demi Round and one 11/0 (repeat three times)
One Demi Round
Three 15/0 Beads
One 11/0, one bugle, and one 11/0
Three 15/0 Beads
One Demi Round and one 11/0 (repeat two times)
One Demi Round
One 15/0, One 11/0, One 15/0
One Crystal
One 15/0
Skip over the last bead added and go back through the rest of the beads in the fringe pattern. Bring your thread back through the same bead you are exiting from, from the other side of the bead.
Position your thread so that it is coming out of one of the beads to one side of the center bead. Then, add these beads for the fringe:
One 15/0 bead
One Demi Round and one 11/0 (repeat two times)
One Demi Round
Three 15/0 Beads
One 11/0, one bugle, and one 11/0
Three 15/0 Beads
One Demi Round and one 11/0 (repeat two times)
One Demi Round
One 15/0, One 11/0, One 15/0
One Crystal
One 15/0
Skip over the last bead added and go back through the rest of the beads in the fringe pattern. Bring your thread back through the same bead you are exiting from, from the other side of the bead.
Position your thread so that it is coming out of the bead to the other side of the center bead and repeat the previous step.
Position your thread at the top of the pear shape and stitch an earwire on. Secure and trim any threads.
Repeat these steps to make the second earring.
Note: Please make sure to double check our list of components with what's actually in stock on the supplies tab. We've also added alternate supply codes to try if the original ones are not in stock. PRESTIGE 4320 14mm Pear Fancy Stone Crystal Purple Ignite (4320-CPIG14, qty 2) (Or, try 4320-CAB14) TOHO Treasure 11/0 Transparent Frosted Blackberry Gold Luster Seed Bead 2.5-Inch Tube (TTB11-625F, qty 1) (Or, try TTB11-252) TOHO Bead Round 15/0 Matte Metallic Iris Purple 2.5-Inch Tube (TBRD15-85, qty 1) (Or, try TBRD15-461) TOHO Demi Round Bead 11/0 Matte Color Transparent Gold Luster Hydrangea 2.5-Inch Tube (TBDMR11-635F, qty 1) (Or, try TBDMR11-205C) Miyuki 6mm Matte Metallic Dark Raspberry Bugle Beads 5-Inch Tube (BEADS-4022, qty 1) (Or, try BEADS-4040) PRESTIGE 5000 4mm Faceted Round Cyclamen Opal Shimmer (5000-CYOPS4, qty 6) (Or, try 5000-AMYLTS4) TierraCast Sterling Silver Earwire with 3mm Ball and Coil (1 Pair) (SS-1180, qty 1) The BeadSmith Smoke Gray FireLine - 50 Yards (6-Pound Test) (FL06SG50, qty 1) Tulip Beading Needle No 12 (2 pack) (NEED-21, qty 1)