Create a decreasing brick stitch triangle using 11/0 seed beads. Take a look at our Vipera PDF Diagram for the color pattern to use on each row. We used ColorTrends Metallic Warm Taupe beads for the black beads in the diagram, Matte Nickel-Plated Plum/Bronze Iris for the green beads, Silver-Lined Smokey Topaz for the pale blue beads, and PermaFinish Silver-Lined Milky Pomegranate for the off-white beads. You'll also find variations on width and length of the brick stitch triangle in the PDF diagram.
Before beginning your fringe, you will want to iron or stretch the thread you use, so the fringe doesn't curl up at all. We used a synthetic material for our beading thread, so use a warm iron on a very low setting. Using a setting that is too high could melt synthetic threads.
Add a new thread to create your first row of fringe and make sure the thread is coming out of one of the end seed beads in the first row of the triangle. Using the PDF diagram as a reference, add the first row of fringe. Remember, you can play with the length and pattern of your fringe, as the variations in our diagram show. Also note that we used TOHO 15/0 bead rounds before and after every Miyuki 6mm bugle bead. Instead of adding a 15/0 bead, a fire-polished bead, and a 15/0 bead to the end of each fringe like the diagram shows, we added a 15/0 bead and a Czech glass leaf bead.
After you've added your last bead in the first row of fringe (a leaf bead), go back through the 15/0 bead and every bead before that in the row. Bring your thread up through a couple of beads in the brick stitch before going back down and out of the next bead over in the last row of brick stitch. When creating your fringe, you don't want to pull too tight, but you also don't want the fringe too loose, as that will leave gaps between the beads. With your thread coming out of the bead for the next row of fringe (but before adding any beads for the next row of fringe), adjust the tension so that the beads hang just right. Make sure to check your tension consistently as you add your rows of fringe.
Keep adding fringe coming out of each bead in the last row of brick stitch in the same manner as before. You will use the same thread for each fringe until you run out of length. Then, just add a new thread (make sure it's ironed/stretched). When you've added the last row of fringe, secure and trim your thread within the brick stitch triangle.
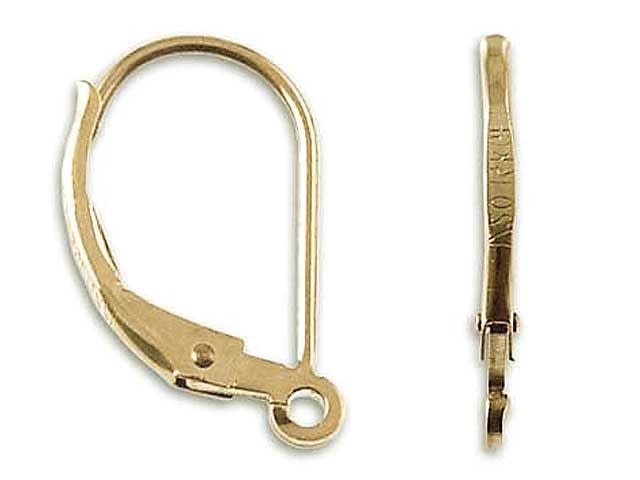
Use the tail at the top of your brick stitch triangle to attach the lever-back earring to the triangle. Secure and trim the thread.
Repeat steps 1-7 to create the other earring.
Note: Please make sure to double check our list of components with what's actually in stock on the supplies tab. We've also added alternate supply codes to try if the original ones are not in stock. TOHO Bead Round 11/0 Matte Nickel-Plated Plum/Bronze Iris, 2.5-Inch Tube (TBRD11-514F, qty 1) (Or, shop all TOHO 11/0 Round Seed Beads) TOHO Bead Round 15/0 Gold Lustered Transparent Pink 2.5-Inch Tube (TBRD15-421, qty 1) (Or, shop all TOHO 15/0 Seed Beads) TOHO Round Bead 11/0 PermaFinish Silver-Lined Milky Pomegranate 2.5-Inch Tube (TBRD11-PF2113, qty 2) TOHO Bead Round 11/0 Silver-Lined Smokey Topaz, 2.5-Inch Tube (TBRD11-34, qty 1) TOHO 11/0 Hybrid ColorTrends Metallic Warm Taupe Round Bead 2.5-Inch Tube (TBRD11-YPS0020, qty 1) (Not available, try TBRDT11-PF594F) Miyuki 6mm Dark Topaz Rainbow Gold Bugle Beads 5-Inch Tube (BEADS-3801, qty 1) (Or, shop all Miyuki Bugle Beads) Czech Glass 10x6mm Mustard and Red Opaque Mix with Dark Bronze Wash Small Leaf Bead Strand by Raven's Journey (BEADS7591, qty 2) (Or, try BEADS7594 or BEADS7587) TOHO One-G Beading Thread Orange 50-Yard Spool (STRNG0474, qty 1) Tulip Beading Needle No 12 (2 pack) (NEED-21, qty 1) Gold-Filled 14K/20 Plain Leverback Earrings (Pair) (GF-LVR1, qty 1)
Add all available items to your cart at once or edit the quantities below.
Any items with quantities lower than stated minimums will default to the minimum in your cart.
Nice choice! All or most of the products needed for this project are shown
below with quantities. Sometimes we sell out of components and aren’t able to order more from
the manufacturer (we know, it is very disappointing to us, too). Use the opportunity to mix up
the design and make it yours by substituting similar products or altering the entire color
scheme—it’s up to you!
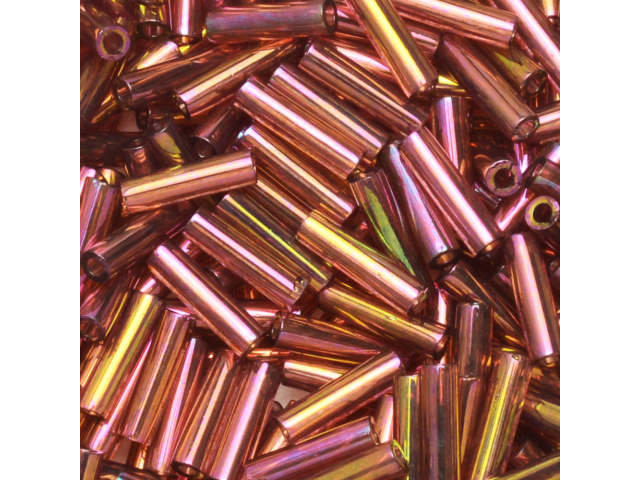
Miyuki 6mm Dark Topaz Rainbow Gold Bugle Beads 5-Inch Tube
Code BEADS-3801
$8.66
$11.99
×1
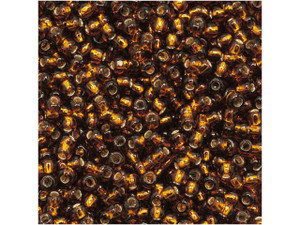
TOHO Bead Round 11/0 Silver-Lined Smokey Topaz, 2.5-Inch Tube
Code TBRD11-34
$1.50
$2.63
×1
Tulip Beading Needle No 12 (2 Piece Pack)
Code NEED-21
$17.99
×1
Step-by-Step Instructions
Create a decreasing brick stitch triangle using 11/0 seed beads. Take a look at our Vipera PDF Diagram for the color pattern to use on each row. We used ColorTrends Metallic Warm Taupe beads for the black beads in the diagram, Matte Nickel-Plated Plum/Bronze Iris for the green beads, Silver-Lined Smokey Topaz for the pale blue beads, and PermaFinish Silver-Lined Milky Pomegranate for the off-white beads. You'll also find variations on width and length of the brick stitch triangle in the PDF diagram.
Before beginning your fringe, you will want to iron or stretch the thread you use, so the fringe doesn't curl up at all. We used a synthetic material for our beading thread, so use a warm iron on a very low setting. Using a setting that is too high could melt synthetic threads.
Add a new thread to create your first row of fringe and make sure the thread is coming out of one of the end seed beads in the first row of the triangle. Using the PDF diagram as a reference, add the first row of fringe. Remember, you can play with the length and pattern of your fringe, as the variations in our diagram show. Also note that we used TOHO 15/0 bead rounds before and after every Miyuki 6mm bugle bead. Instead of adding a 15/0 bead, a fire-polished bead, and a 15/0 bead to the end of each fringe like the diagram shows, we added a 15/0 bead and a Czech glass leaf bead.
After you've added your last bead in the first row of fringe (a leaf bead), go back through the 15/0 bead and every bead before that in the row. Bring your thread up through a couple of beads in the brick stitch before going back down and out of the next bead over in the last row of brick stitch. When creating your fringe, you don't want to pull too tight, but you also don't want the fringe too loose, as that will leave gaps between the beads. With your thread coming out of the bead for the next row of fringe (but before adding any beads for the next row of fringe), adjust the tension so that the beads hang just right. Make sure to check your tension consistently as you add your rows of fringe.
Keep adding fringe coming out of each bead in the last row of brick stitch in the same manner as before. You will use the same thread for each fringe until you run out of length. Then, just add a new thread (make sure it's ironed/stretched). When you've added the last row of fringe, secure and trim your thread within the brick stitch triangle.
Use the tail at the top of your brick stitch triangle to attach the lever-back earring to the triangle. Secure and trim the thread.
Repeat steps 1-7 to create the other earring.
Note: Please make sure to double check our list of components with what's actually in stock on the supplies tab. We've also added alternate supply codes to try if the original ones are not in stock. TOHO Bead Round 11/0 Matte Nickel-Plated Plum/Bronze Iris, 2.5-Inch Tube (TBRD11-514F, qty 1) (Or, shop all TOHO 11/0 Round Seed Beads) TOHO Bead Round 15/0 Gold Lustered Transparent Pink 2.5-Inch Tube (TBRD15-421, qty 1) (Or, shop all TOHO 15/0 Seed Beads) TOHO Round Bead 11/0 PermaFinish Silver-Lined Milky Pomegranate 2.5-Inch Tube (TBRD11-PF2113, qty 2) TOHO Bead Round 11/0 Silver-Lined Smokey Topaz, 2.5-Inch Tube (TBRD11-34, qty 1) TOHO 11/0 Hybrid ColorTrends Metallic Warm Taupe Round Bead 2.5-Inch Tube (TBRD11-YPS0020, qty 1) (Not available, try TBRDT11-PF594F) Miyuki 6mm Dark Topaz Rainbow Gold Bugle Beads 5-Inch Tube (BEADS-3801, qty 1) (Or, shop all Miyuki Bugle Beads) Czech Glass 10x6mm Mustard and Red Opaque Mix with Dark Bronze Wash Small Leaf Bead Strand by Raven's Journey (BEADS7591, qty 2) (Or, try BEADS7594 or BEADS7587) TOHO One-G Beading Thread Orange 50-Yard Spool (STRNG0474, qty 1) Tulip Beading Needle No 12 (2 pack) (NEED-21, qty 1) Gold-Filled 14K/20 Plain Leverback Earrings (Pair) (GF-LVR1, qty 1)