Kids love rainbow colors! This project is a fun one to help them with when they're home for the summer.
Brighten up your days with these eye-catching bracelets. These bracelets are a fun project for you and your little one to do together. Your child will appreciate the joyful colors and you'll be able to teach them a cool and easy beading technique. Learn how to make these bracelets and add some sunshine to your style
The child-sized bracelets use bright 6/0 beads and each bead is a party If you are making these bracelets with your child, you will need to help them thread the needle. A long, finer needle and fine thread offers more clearance while weaving and are less apt to pierce the warp thread. It is also less likely to come unthreaded while weaving. The child can use the sharp end of the needle forward rather than backward, which is usually recommended as you are less likely to poke your hand this way. You can also sand the sharp end of the needle with sandpaper to dull the tip. You can always choose to use a heavier needle with a larger eye as long as it fits through the beads. We recommend tying the thread to the needle in this case or the thread will likely come unthreaded while weaving.
Help the child warp the Ricks Beading Loom according to the manufacturer's instructions. Set the loom at 5 1/4 inches for 34 rows of size 6/0 seed beads.
Follow the pattern in the You Are My Sunshine Diagram PDF. Sort the beads into the color order for your child and then help them weave if necessary. They will need help especially getting started with the first few rows and at the end when the beads get tight. Help them knot off the ends and leave one tail on each end for the loop and button closure.
To make the button of the bracelet, add three seed beads coming out of the center of one end. This will be the stem leading to your button. Add three seed beads of a different color to the thread, fold the thread in half and add three more seed beads. Keep the two groups of three folded as separate columns. Bring the thread back up through the first column and then down through the second column to reinforce them. You can do this several times. With your needle coming out of the second column, add three more seed beads. This is the third column. Come back up through the second column and down through the third column. Go through the columns a few times to reinforce them. With your needle coming out of the third column, add three more seed beads. This is the fourth column. Come back up through the third column and down through the fourth column. Reinforce. With your needle coming out of the top of the fourth column, go down through the first column. Reinforce.
Now your needle should be coming out of the top of one of the columns. Add a seed bead of a different color and go down through a column on the opposite side. Bring your needle up through one of the columns and back through the seed bead at the top of the button. Now, your thread will go through the center of the columns and down through the stem. Weave the thread back into the bracelet and knot the ends. Make the loop to fit the button on the other end for each bracelet. Weave the thread back into the bracelet and knot the ends. Repeat these steps for the other child-sized bracelet.
Adult Bracelets
Set the loom approximately 6 1/6 inches apart for 55 rows of 8/0 seed beads. Follow the pattern in the above PDF to create the shorter, wider bracelet. Make the button for the bracelet using the dot stitch technique. Make the loop to fit the button on the other end of the bracelet. Weave any remaining thread back into the bracelet and knot the ends.
To create the wrap bracelet, set the loom approximately 6 1/6 inches apart for 55 rows of 8/0 seed beads. Follow the pattern in the PDF. Repeat this length once for a double wrap and three times for a triple wrap. Make note of where your pattern left off in the previous strip and continue from there for each consecutive strip. Sew the strips together. Connect these loomed pieces together by sewing them together. Make the button using the dot stitch technique. Make the loop to fit the button on the other end of the bracelet. Weave any remaining thread back into the bracelet and knot the ends.
Add all available items to your cart at once or edit the quantities below.
Any items with quantities lower than stated minimums will default to the minimum in your cart.
Nice choice! All or most of the products needed for this project are shown
below with quantities. Sometimes we sell out of components and aren’t able to order more from
the manufacturer (we know, it is very disappointing to us, too). Use the opportunity to mix up
the design and make it yours by substituting similar products or altering the entire color
scheme—it’s up to you!
Please wait while we add the products to your cart.
You Are My Sunshine
Loomed Rainbow Seed Bead Bracelets
designed byCheri Carlson
Skill LevelBeginner
TechniqueSeed-Beading
Time1-3 Hours
Approximate SizeWrist: 5 1/2
Kids love rainbow colors! This project is a fun one to help them with when they're home for the summer.
Brighten up your days with these eye-catching bracelets. These bracelets are a fun project for you and your little one to do together. Your child will appreciate the joyful colors and you'll be able to teach them a cool and easy beading technique. Learn how to make these bracelets and add some sunshine to your style
Supplies
The BeadSmith 10 Long English Beading Needles 4-Pack
Code NEED-04
$7.19
$8.99
×1
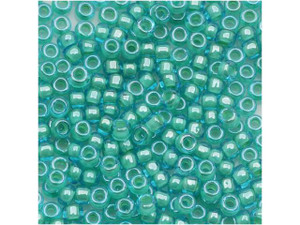
TOHO Bead Round 6/0 Jonquil-Lined Light Aquamarine 2.5-Inch Tube
Code TBRD6-954
$1.96
$2.52
×1
TOHO Bead Round 8/0 Silver-Lined Milky Grapefruit PermaFinish 2.5-Inch Tube
Code TBRD8-PF2112
$2.55
$3.40
×1
TOHO Bead Round 8/0 Yellow Lined Aqua, 2.5-Inch Tube
Code TBRD8-954
$1.81
$2.41
×1
The BeadSmith Crystal Clear FireLine - 50 Yards (6-Pound Test)
Code FL06CR50
$13.59
$16.99
×1
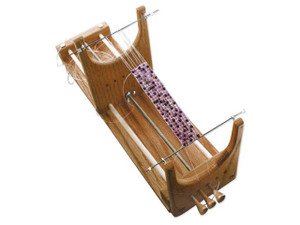
The Ricks Beading Loom
Code TOOL-0077
$48.79
$60.99
×1
TOHO Bead Round 6/0 Transparent Ballerina Pink AB, 2.5-Inch Tube
Code TBRD6-171D
$1.97
$2.63
×1
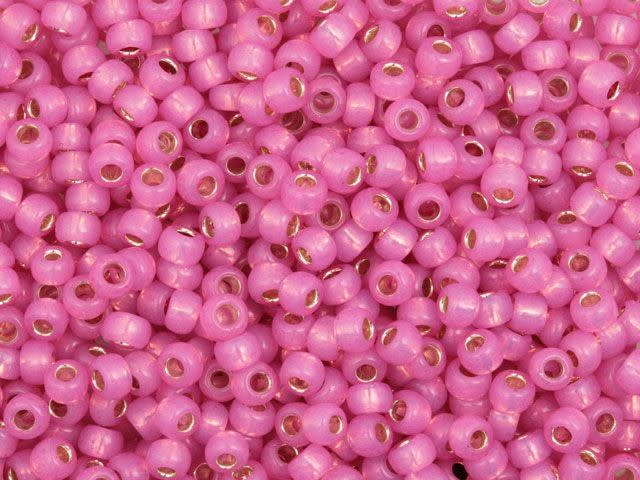
TOHO Bead Round 8/0 Silver-Lined Dark Pink Opal, 2.5-Inch Tube
Code TBRD8-2106
$1.95
$2.52
×1
Step-by-Step Instructions
Child Bracelets
The child-sized bracelets use bright 6/0 beads and each bead is a party If you are making these bracelets with your child, you will need to help them thread the needle. A long, finer needle and fine thread offers more clearance while weaving and are less apt to pierce the warp thread. It is also less likely to come unthreaded while weaving. The child can use the sharp end of the needle forward rather than backward, which is usually recommended as you are less likely to poke your hand this way. You can also sand the sharp end of the needle with sandpaper to dull the tip. You can always choose to use a heavier needle with a larger eye as long as it fits through the beads. We recommend tying the thread to the needle in this case or the thread will likely come unthreaded while weaving.
Help the child warp the Ricks Beading Loom according to the manufacturer's instructions. Set the loom at 5 1/4 inches for 34 rows of size 6/0 seed beads.
Follow the pattern in the You Are My Sunshine Diagram PDF. Sort the beads into the color order for your child and then help them weave if necessary. They will need help especially getting started with the first few rows and at the end when the beads get tight. Help them knot off the ends and leave one tail on each end for the loop and button closure.
To make the button of the bracelet, add three seed beads coming out of the center of one end. This will be the stem leading to your button. Add three seed beads of a different color to the thread, fold the thread in half and add three more seed beads. Keep the two groups of three folded as separate columns. Bring the thread back up through the first column and then down through the second column to reinforce them. You can do this several times. With your needle coming out of the second column, add three more seed beads. This is the third column. Come back up through the second column and down through the third column. Go through the columns a few times to reinforce them. With your needle coming out of the third column, add three more seed beads. This is the fourth column. Come back up through the third column and down through the fourth column. Reinforce. With your needle coming out of the top of the fourth column, go down through the first column. Reinforce.
Now your needle should be coming out of the top of one of the columns. Add a seed bead of a different color and go down through a column on the opposite side. Bring your needle up through one of the columns and back through the seed bead at the top of the button. Now, your thread will go through the center of the columns and down through the stem. Weave the thread back into the bracelet and knot the ends. Make the loop to fit the button on the other end for each bracelet. Weave the thread back into the bracelet and knot the ends. Repeat these steps for the other child-sized bracelet.
Adult Bracelets
Set the loom approximately 6 1/6 inches apart for 55 rows of 8/0 seed beads. Follow the pattern in the above PDF to create the shorter, wider bracelet. Make the button for the bracelet using the dot stitch technique. Make the loop to fit the button on the other end of the bracelet. Weave any remaining thread back into the bracelet and knot the ends.
To create the wrap bracelet, set the loom approximately 6 1/6 inches apart for 55 rows of 8/0 seed beads. Follow the pattern in the PDF. Repeat this length once for a double wrap and three times for a triple wrap. Make note of where your pattern left off in the previous strip and continue from there for each consecutive strip. Sew the strips together. Connect these loomed pieces together by sewing them together. Make the button using the dot stitch technique. Make the loop to fit the button on the other end of the bracelet. Weave any remaining thread back into the bracelet and knot the ends.