I tried using SilverSilk for a unique material in this kumihimo bracelet.
The art of kumihimo allows you to be innovative in your jewelry-making and creative in the types of materials you incorporate into your designs. Designer Cheri used strands of SilverSilk to create this kumihimo masterpiece. The result is a bracelet sophisticatedly simple enough to be worn on any occasion and sturdy enough to stand the test of time.
You will need eight 18-inch pieces of SilverSilk: four pieces of SilverSilk 3 needle round silver-plated copper knitted jewelry wire mesh, two pieces of SilverSilk 3 needle round copper-plated copper knitted jewelry wire mesh and two pieces of SilverSilk 3 needle round black-plated copper knitted jewelry wire mesh.
Place the SilverSilk on the kumihimo disk positioned to create an eight strand kumihimo braid. The steps outlined here will explain the exact placement of the different SilverSilk colors on the disk and any differences in working with SilverSilk as opposed to regular cording.
Instead of knotting the SilverSilk pieces together at one end, run a needle and thread or a very fine gauge wire (we used 30 gauge) through the weave of each piece of SilverSilk to gather them up together. Then, wrap the thread or wire around all of them in a bundle. Knot the ends to secure.
Place the different colors of SilverSilk on the kumihimo disk as follows: A strand of copper at position 1, a strand of silver at 8, another strand of silver at 9, a strand of black at 16, another strand of copper at 17, another strand of silver at 24, a strand of silver at 25 and a strand of black at 32.
Braid the SilverSilk together until your cord is approximately six inches long.
Finish the ends of the cord in the same way you secured them in step three. Trim the excess SilverSilk tails on both ends of the cord.
Cut a 5-inch piece of 22 gauge wire. Thread an inch of the wire through the braid at one end of the cord, just below the wrap and twist it together to secure it onto the cord. String an antique silver-plated brass small Viking knitting end cap with wave design onto the end of the wire, to cover the wrapped ends. String a TierraCast copper antique 5mm faceted spacer on to the wire sticking out of the end cap.
Cut a length of antique silver-plated split ring cable chain approximately two inches long or 11 links. Attach the wire sticking out of the end cap to one end of the chain with a wrapped loop. String a TierraCast copper Kenyan heishi spacer onto a 2-inch 22 gauge sterling silver head pin, followed by the Nunn Design antique copper-plated pewter faceted roundel bead and another Kenyan heishi spacer. Attach this dangle to the end of the chain by creating a wrapped loop.
Repeat step seven for the other end of the cord. Cut a length of split ring cable chain approximately one inch long or five links. Attach one end of the chain to the wire with a wrapped loop. Attach a 12x6.5mm antique silver-plated trigger clasp to the end of the chain using a 5mm 18 gauge antique silver-plated open jump ring.
Add all available items to your cart at once or edit the quantities below.
Any items with quantities lower than stated minimums will default to the minimum in your cart.
Nice choice! All or most of the products needed for this project are shown
below with quantities. Sometimes we sell out of components and aren’t able to order more from
the manufacturer (we know, it is very disappointing to us, too). Use the opportunity to mix up
the design and make it yours by substituting similar products or altering the entire color
scheme—it’s up to you!
Please wait while we add the products to your cart.
Softness and Strength
Three-Toned Woven Wire Kumihimo Bracelet
designed byCheri Carlson
Skill LevelBeginner
TechniqueKumihimo
Time4-6 Hours
Approximate Size7 Inches (Adjustable)
I tried using SilverSilk for a unique material in this kumihimo bracelet.
The art of kumihimo allows you to be innovative in your jewelry-making and creative in the types of materials you incorporate into your designs. Designer Cheri used strands of SilverSilk to create this kumihimo masterpiece. The result is a bracelet sophisticatedly simple enough to be worn on any occasion and sturdy enough to stand the test of time.
Supplies
2-inch Head Pin, 22 Gauge (Sterling Silver)
Code SS-HP22
$1.22
$1.53
×1
The Beadsmith Kumihimo Round Braiding Foam Disk with Instructions
Code TOOL-616
$6.39
$7.99
×1
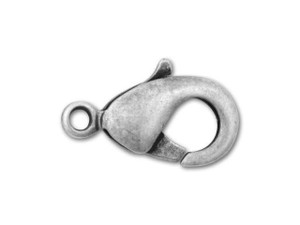
12x6.5mm Antique Silver-Plated Trigger Clasp
Code SPA-CL02
$6.64
$8.37
×1
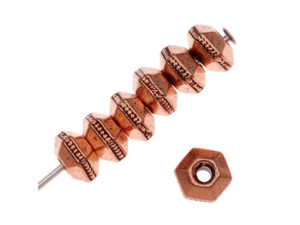
TierraCast Copper Antique 5mm Faceted Spacer Bead
Code CA-0423
$0.25
$0.32
×2
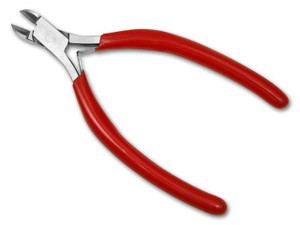
Ergonomic Side Cutter - Semi Flush
Code TOOL-128
$11.04
$13.99
×1
5mm Antique Silver-Plated Open Jump Ring - 18 Gauge
You will need eight 18-inch pieces of SilverSilk: four pieces of SilverSilk 3 needle round silver-plated copper knitted jewelry wire mesh, two pieces of SilverSilk 3 needle round copper-plated copper knitted jewelry wire mesh and two pieces of SilverSilk 3 needle round black-plated copper knitted jewelry wire mesh.
Place the SilverSilk on the kumihimo disk positioned to create an eight strand kumihimo braid. The steps outlined here will explain the exact placement of the different SilverSilk colors on the disk and any differences in working with SilverSilk as opposed to regular cording.
Instead of knotting the SilverSilk pieces together at one end, run a needle and thread or a very fine gauge wire (we used 30 gauge) through the weave of each piece of SilverSilk to gather them up together. Then, wrap the thread or wire around all of them in a bundle. Knot the ends to secure.
Place the different colors of SilverSilk on the kumihimo disk as follows: A strand of copper at position 1, a strand of silver at 8, another strand of silver at 9, a strand of black at 16, another strand of copper at 17, another strand of silver at 24, a strand of silver at 25 and a strand of black at 32.
Braid the SilverSilk together until your cord is approximately six inches long.
Finish the ends of the cord in the same way you secured them in step three. Trim the excess SilverSilk tails on both ends of the cord.
Cut a 5-inch piece of 22 gauge wire. Thread an inch of the wire through the braid at one end of the cord, just below the wrap and twist it together to secure it onto the cord. String an antique silver-plated brass small Viking knitting end cap with wave design onto the end of the wire, to cover the wrapped ends. String a TierraCast copper antique 5mm faceted spacer on to the wire sticking out of the end cap.
Cut a length of antique silver-plated split ring cable chain approximately two inches long or 11 links. Attach the wire sticking out of the end cap to one end of the chain with a wrapped loop. String a TierraCast copper Kenyan heishi spacer onto a 2-inch 22 gauge sterling silver head pin, followed by the Nunn Design antique copper-plated pewter faceted roundel bead and another Kenyan heishi spacer. Attach this dangle to the end of the chain by creating a wrapped loop.
Repeat step seven for the other end of the cord. Cut a length of split ring cable chain approximately one inch long or five links. Attach one end of the chain to the wire with a wrapped loop. Attach a 12x6.5mm antique silver-plated trigger clasp to the end of the chain using a 5mm 18 gauge antique silver-plated open jump ring.