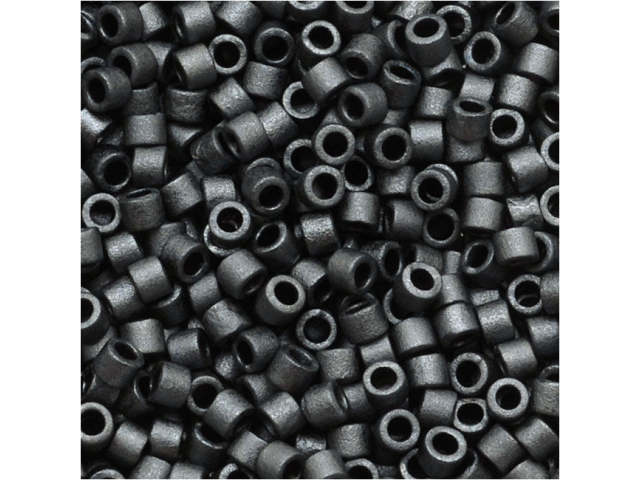
I used matte beads for the main pattern in this design. The borders are a metallic silver that gleams as the light catches it.
Sometimes the simplest of techniques are made extraordinary by the right color pattern. Cheri came up with this captivating pattern for her loomed bracelet and the results are truly enchanting. The pop of shining silver really makes the block design come alive in a mesmerizing way. Learn how to make this bracelet and add Hypnotic Blocks to your style
Follow the manufacturer's instructions on how to warp the Ricks beading loom. Our bracelet pattern is approximately 6 3/8 inches, so we set the head and footstock approximately 160mm or 6 5/16 inches apart. Make sure to leave a warp or weft tail long enough at the start of the bracelet so that after tying threads off you can use it to sew on the clasp.
Follow the pattern in the Hypnotic Blocks Pattern Diagram PDF when adding Miyuki Delica seed beads to the loom. This pattern is meant to be a guideline for your project. Depending on how accurate you set the length of the loom or how tight you weave, your piece could come out a row shorter or longer. If you reach the end of your bracelet and still want to add a row or two to the pattern, you can add the rows by hand. This technique will allow you to add rows to the beginning of the bracelet, too.
If you want to make your bracelet a different size from ours, refer to the diagram and adjust accordingly. You can add weft thread to the loom as necessary if you run short part of the way through your project.
To add the 24.5x10mm gunmetal-plated 4 ring magnetic tube clasp, center the clasp at one end of the bracelet with the two parts of the clasp together. Bring the tail of your thread or a new thread between the seed beads and in line with one of the end rings on the clasp. Bring your thread through the ring and then through the seed bead to the left of where your thread began. Loop your thread through the ring again and bring the thread back through the seed bead. Your thread should be back where you started it. Loop through the ring of the clasp and then go through the seed bead to the right. Loop through the ring and go back through the seed bead, back to the center where you started. Repeat this process to reinforce the thread on the ring. Repeat for all of the rings on the clasp. Repeat this step for the other side of the bracelet, with the clasp still together. Once you get one ring attached to the end of the bracelet, you can unclasp the bracelet for easier stitching.
List of Components: Miyuki 8g 11/0 Metallic Galvanized Silver Delicas (DB0035, qty 1) Miyuki 8g 11/0 Metallic Matte Charcoal Delica Seed Beads (DB0306, qty 1) Miyuki 8g 11/0 Metallic Matte Dark Nickel Silver Delica Seed Beads (DB0321, qty 1) 24.5x10mm Gunmetal-Plated 4 Ring Magnetic Tube Clasp (CLASP-0473, qty 1)
Add all available items to your cart at once or edit the quantities below.
Any items with quantities lower than stated minimums will default to the minimum in your cart.
Nice choice! All or most of the products needed for this project are shown
below with quantities. Sometimes we sell out of components and aren’t able to order more from
the manufacturer (we know, it is very disappointing to us, too). Use the opportunity to mix up
the design and make it yours by substituting similar products or altering the entire color
scheme—it’s up to you!
Please wait while we add the products to your cart.
Hypnotic Blocks
Geometric Gray Loomed Bracelet
designed byCheri Carlson
Skill LevelIntermediate
TechniqueSeed-Beading
Approximate SizeWrist Size: 6 3/4 Inches
I used matte beads for the main pattern in this design. The borders are a metallic silver that gleams as the light catches it.
Sometimes the simplest of techniques are made extraordinary by the right color pattern. Cheri came up with this captivating pattern for her loomed bracelet and the results are truly enchanting. The pop of shining silver really makes the block design come alive in a mesmerizing way. Learn how to make this bracelet and add Hypnotic Blocks to your style
Follow the manufacturer's instructions on how to warp the Ricks beading loom. Our bracelet pattern is approximately 6 3/8 inches, so we set the head and footstock approximately 160mm or 6 5/16 inches apart. Make sure to leave a warp or weft tail long enough at the start of the bracelet so that after tying threads off you can use it to sew on the clasp.
Follow the pattern in the Hypnotic Blocks Pattern Diagram PDF when adding Miyuki Delica seed beads to the loom. This pattern is meant to be a guideline for your project. Depending on how accurate you set the length of the loom or how tight you weave, your piece could come out a row shorter or longer. If you reach the end of your bracelet and still want to add a row or two to the pattern, you can add the rows by hand. This technique will allow you to add rows to the beginning of the bracelet, too.
If you want to make your bracelet a different size from ours, refer to the diagram and adjust accordingly. You can add weft thread to the loom as necessary if you run short part of the way through your project.
To add the 24.5x10mm gunmetal-plated 4 ring magnetic tube clasp, center the clasp at one end of the bracelet with the two parts of the clasp together. Bring the tail of your thread or a new thread between the seed beads and in line with one of the end rings on the clasp. Bring your thread through the ring and then through the seed bead to the left of where your thread began. Loop your thread through the ring again and bring the thread back through the seed bead. Your thread should be back where you started it. Loop through the ring of the clasp and then go through the seed bead to the right. Loop through the ring and go back through the seed bead, back to the center where you started. Repeat this process to reinforce the thread on the ring. Repeat for all of the rings on the clasp. Repeat this step for the other side of the bracelet, with the clasp still together. Once you get one ring attached to the end of the bracelet, you can unclasp the bracelet for easier stitching.
List of Components: Miyuki 8g 11/0 Metallic Galvanized Silver Delicas (DB0035, qty 1) Miyuki 8g 11/0 Metallic Matte Charcoal Delica Seed Beads (DB0306, qty 1) Miyuki 8g 11/0 Metallic Matte Dark Nickel Silver Delica Seed Beads (DB0321, qty 1) 24.5x10mm Gunmetal-Plated 4 Ring Magnetic Tube Clasp (CLASP-0473, qty 1)