I love the way the seed beads and bicones add a gleaming trim to this velvet ribbon choker. You could repeat the trim on the other side for a bracelet design.
Velvet ribbon makes a rich foundation for jewelry designs. The soft and luxurious fabric is a perfect option for chokers. Cheri made her velvet choker stand out by adding a seed bead and bicone fringe to the bottom edge. The beads add gleaming scallops that catch the eye and complement the ribbon perfectly. You can see more ideas for using ribbons in your jewelry designs in this Artbeads Cafe episode.
Your choker needs to be snug but not too tight. The size of the choker is adjusted by the extender chain at the clasp. This design makes a 12 1/2 to 13 1/2-inch choker. The finished ribbon measures 11 1/4 inches with the ends on and there is a 1 3/4-inch gap between the ends for the chain and clasp.
Cut the chocolate 5/8 inch velvet ribbon about one inch larger than needed. The ribbon will fray, so to prevent this, create a running stitch with needle and thread about a quarter of an inch from the end from one edge of the ribbon to the other. At each edge, wrap the thread three to four times to secure the edge and then finish the thread in the middle of the ribbon. Run a small bead of adhesive along the stitching, making sure to cover the edges where the stitching is. Allow to dry and then trim the end close to the stitching.
Place a 16mm silver-plated basket weave ribbon end crimp over the end of the ribbon and crimp in place with nylon jaw pliers.
Attach a new thread to the edge of the ribbon near the ribbon end crimp. The tail will get woven into the beads later.
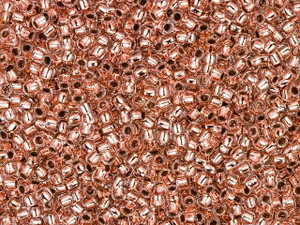
Add three TOHO Takumi large-hole round 11/0 bead in copper-lined crystal to the thread and then run the needle through the edge of the ribbon approximately 1/8-inch away from the start, making sure to stay out of the nap of the ribbon. Run the needle back through the last bead added. This step is illustrated in figure 1 of our Cerise PDF Diagram.
Continue adding seed bead trim by only adding two seed beads at a time, as shown in figure 1 of the PDF diagram. Continue this until you are at the approximately halfway point or center of the necklace. The 41st seed bead stitched to the edge will be the center of your necklace (keeping in mind that the 1st and 3rd beads of your trim are the first and second beads stitched to the edge). Mark the 41st bead by temporarily tying a piece of thread to it. Continue beading until you have stitched 40 beads to the edge on the other side (the same amount as on the other side of the 41st bead). Make a tiny knot at the edge, but do not cut the thread.
Turn the piece over to the back. Thread the needle through the last two beads added, as shown in figure 2 of the PDF diagram. The thread should be exiting out of the center bead of the last three-bead scallop in the trim.
Add a seed bead to the thread and then go through the center bead of the next scallop over, as shown in figure 3 of the PDF diagram. Add a 3mm bicone in Crystal Rose Gold 2x and then go through the center bead of the next scallop over. Repeat this technique as shown in figure 3 of the PDF diagram, alternating seed beads and bicones, until you get to the other end of the ribbon.
Tie off the thread by making a tiny knot at the edge. Weave back through some beads and tie another knot at the edge. Hide the tail in beads and trim. Repeat at the other end of the bracelet.
Create a running stitch about 1/8-inch away from the last bead in the trim, as you did on the other end of the choker, to secure the edges. Apply adhesive, allow to dry, and then trim.
Attach the other ribbon end crimp to this end of the necklace as you did before with nylon jaw pliers.
Attach the sterling silver 5.5mm lightweight spring ring with flat open ring to one end of the choker using six sterling silver 4.60mm open jump rings linked together.
Slide a bicone onto a 1 1/2-inch 24 gauge sterling silver head pin and make a wrapped loop at the top of the bead. Attach to the other end of the choker using 12 jump rings linked together.
List of Components Chocolate 5/8 inch Velvet Ribbon By the Foot (BTF-1202, qty 1) 5328 3mm Bicone Crystal Rose Gold 2x (5328-CRG2X3, qty 42) TOHO Takumi Large-Hole Round 11/0 Bead - Copper-Lined Crystal (TTR11-740, qty 1) 16mm Silver-Plated Basket Weave Ribbon End Crimp (2 piece Pack) (FIND-2331, qty 1) Sterling Silver 5.5mm Lightweight Spring Ring with Flat Open Ring (CLASP-0717, qty 1) Sterling Silver Open Jump Ring - 0.035 x .180 inches (0.90 x 4.60mm) (SS-OJR35-C, qty 18) 1 1/2-inch Head Pin, 24 Gauge (Sterling Silver) (SS-HP4X, qty 1)
Add all available items to your cart at once or edit the quantities below.
Any items with quantities lower than stated minimums will default to the minimum in your cart.
Nice choice! All or most of the products needed for this project are shown
below with quantities. Sometimes we sell out of components and aren’t able to order more from
the manufacturer (we know, it is very disappointing to us, too). Use the opportunity to mix up
the design and make it yours by substituting similar products or altering the entire color
scheme—it’s up to you!
Please wait while we add the products to your cart.
Cerise
Velvet Ribbon Choker with Beaded Trim
designed byCheri Carlson
Skill LevelIntermediate
TechniqueSeed-Beading
Time4-6 Hours
Approximate Size12 1/2-13 1/2 Inches
I love the way the seed beads and bicones add a gleaming trim to this velvet ribbon choker. You could repeat the trim on the other side for a bracelet design.
Velvet ribbon makes a rich foundation for jewelry designs. The soft and luxurious fabric is a perfect option for chokers. Cheri made her velvet choker stand out by adding a seed bead and bicone fringe to the bottom edge. The beads add gleaming scallops that catch the eye and complement the ribbon perfectly. You can see more ideas for using ribbons in your jewelry designs in this Artbeads Cafe episode.
Sterling Silver 5.5mm Lightweight Spring Ring with Flat Open Ring - Min Qty 4
Code CLASP-0717
$0.48
$0.60
×1
PRESTIGE 5328 3mm Bicone Bead Crystal Rose Gold 2x
Code 5328-CRG2X3
$0.23
$0.31
×42
Nylon Jaw Jewelry Pliers
Code TOOL-105
$18.89
$24.99
×1
Sterling Silver 4.6mm Open Jump Ring, 0.90mm Thick
Code SS-OJR35-C
$0.62
$0.77
×18
Step-by-Step Instructions
Your choker needs to be snug but not too tight. The size of the choker is adjusted by the extender chain at the clasp. This design makes a 12 1/2 to 13 1/2-inch choker. The finished ribbon measures 11 1/4 inches with the ends on and there is a 1 3/4-inch gap between the ends for the chain and clasp.
Cut the chocolate 5/8 inch velvet ribbon about one inch larger than needed. The ribbon will fray, so to prevent this, create a running stitch with needle and thread about a quarter of an inch from the end from one edge of the ribbon to the other. At each edge, wrap the thread three to four times to secure the edge and then finish the thread in the middle of the ribbon. Run a small bead of adhesive along the stitching, making sure to cover the edges where the stitching is. Allow to dry and then trim the end close to the stitching.
Place a 16mm silver-plated basket weave ribbon end crimp over the end of the ribbon and crimp in place with nylon jaw pliers.
Attach a new thread to the edge of the ribbon near the ribbon end crimp. The tail will get woven into the beads later.
Add three TOHO Takumi large-hole round 11/0 bead in copper-lined crystal to the thread and then run the needle through the edge of the ribbon approximately 1/8-inch away from the start, making sure to stay out of the nap of the ribbon. Run the needle back through the last bead added. This step is illustrated in figure 1 of our Cerise PDF Diagram.
Continue adding seed bead trim by only adding two seed beads at a time, as shown in figure 1 of the PDF diagram. Continue this until you are at the approximately halfway point or center of the necklace. The 41st seed bead stitched to the edge will be the center of your necklace (keeping in mind that the 1st and 3rd beads of your trim are the first and second beads stitched to the edge). Mark the 41st bead by temporarily tying a piece of thread to it. Continue beading until you have stitched 40 beads to the edge on the other side (the same amount as on the other side of the 41st bead). Make a tiny knot at the edge, but do not cut the thread.
Turn the piece over to the back. Thread the needle through the last two beads added, as shown in figure 2 of the PDF diagram. The thread should be exiting out of the center bead of the last three-bead scallop in the trim.
Add a seed bead to the thread and then go through the center bead of the next scallop over, as shown in figure 3 of the PDF diagram. Add a 3mm bicone in Crystal Rose Gold 2x and then go through the center bead of the next scallop over. Repeat this technique as shown in figure 3 of the PDF diagram, alternating seed beads and bicones, until you get to the other end of the ribbon.
Tie off the thread by making a tiny knot at the edge. Weave back through some beads and tie another knot at the edge. Hide the tail in beads and trim. Repeat at the other end of the bracelet.
Create a running stitch about 1/8-inch away from the last bead in the trim, as you did on the other end of the choker, to secure the edges. Apply adhesive, allow to dry, and then trim.
Attach the other ribbon end crimp to this end of the necklace as you did before with nylon jaw pliers.
Attach the sterling silver 5.5mm lightweight spring ring with flat open ring to one end of the choker using six sterling silver 4.60mm open jump rings linked together.
Slide a bicone onto a 1 1/2-inch 24 gauge sterling silver head pin and make a wrapped loop at the top of the bead. Attach to the other end of the choker using 12 jump rings linked together.
List of Components Chocolate 5/8 inch Velvet Ribbon By the Foot (BTF-1202, qty 1) 5328 3mm Bicone Crystal Rose Gold 2x (5328-CRG2X3, qty 42) TOHO Takumi Large-Hole Round 11/0 Bead - Copper-Lined Crystal (TTR11-740, qty 1) 16mm Silver-Plated Basket Weave Ribbon End Crimp (2 piece Pack) (FIND-2331, qty 1) Sterling Silver 5.5mm Lightweight Spring Ring with Flat Open Ring (CLASP-0717, qty 1) Sterling Silver Open Jump Ring - 0.035 x .180 inches (0.90 x 4.60mm) (SS-OJR35-C, qty 18) 1 1/2-inch Head Pin, 24 Gauge (Sterling Silver) (SS-HP4X, qty 1)