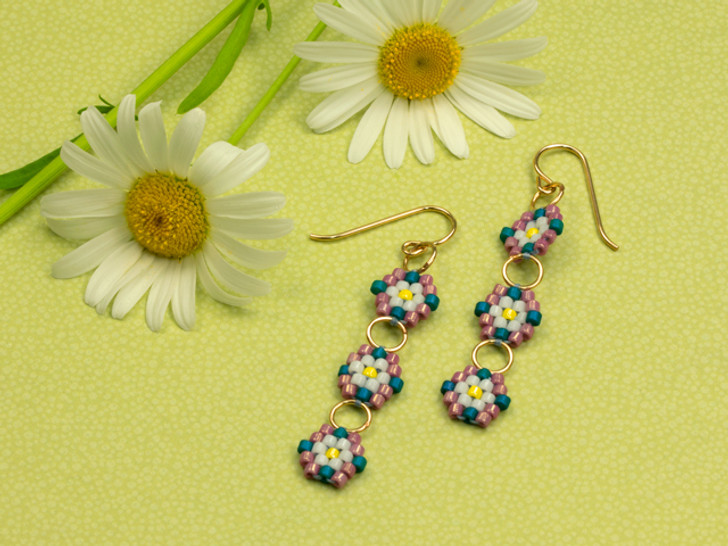


You can choose different colors of seed beads for your own variation on this adorable design!
Use basic brick stitch techniques to start your first row of a daisy focal. Pick up a violet seed bead and a teal seed bead to start the first row of brick stitch. Then, add a violet seed bead to finish the row.
Brick Stitch Diagram
Basic Brick Stitch Text Tutorial
Decreasing and Increasing Brick Stitch Text Tutorial
Brick Stitch Video Tutorial
Start the next row of brick stitch on an increase with a violet seed bead and a white seed bead. Then, add a white seed bead. Finish the row on an increase with a violet seed bead.
Start the next row of brick stitch on an increase with a teal seed bead and a white seed bead. Then, add a yellow seed bead and a white seed bead. Finish the row on an increase with a teal seed bead.
Start the next row of brick stitch on decrease with a violet seed bead and a white seed bead. Then, add a white seed bead. Finish the row on a decrease with a violet seed bead.
Start the next row of brick stitch on decrease with a violet seed bead and a teal seed bead. Finish the row on a decrease with a violet seed bead.
Repeat steps 1-5 two times for a total of three daisy focals
Stitch an earwire to the top of one of the daisy focals. Then, position your thread at the bottom center of the daisy and stitch on a closed jump ring. Secure and trim any threads left on this daisy after securing your jump ring in place.
Stitch the second daisy focal to the bottom of the jump ring attached to the first daisy focal. Position your thread at the bottom center of the daisy and stitch on a closed jump ring. Secure and trim any threads left on this daisy after securing your jump ring in place.
Stitch the third daisy focal to the bottom of the jump ring attached to the first daisy focal. Secure and trim any threads left on this daisy.
Repeat steps 1-9 to make the other earring.
Nice choice! All or most of the products needed for this project are shown below with quantities. Sometimes we sell out of components and aren’t able to order more from the manufacturer (we know, it is very disappointing to us, too). Use the opportunity to mix up the design and make it yours by substituting similar products or altering the entire color scheme—it’s up to you!


You can choose different colors of seed beads for your own variation on this adorable design!


Use basic brick stitch techniques to start your first row of a daisy focal. Pick up a violet seed bead and a teal seed bead to start the first row of brick stitch. Then, add a violet seed bead to finish the row.
Brick Stitch Diagram
Basic Brick Stitch Text Tutorial
Decreasing and Increasing Brick Stitch Text Tutorial
Brick Stitch Video Tutorial
Start the next row of brick stitch on an increase with a violet seed bead and a white seed bead. Then, add a white seed bead. Finish the row on an increase with a violet seed bead.
Start the next row of brick stitch on an increase with a teal seed bead and a white seed bead. Then, add a yellow seed bead and a white seed bead. Finish the row on an increase with a teal seed bead.
Start the next row of brick stitch on decrease with a violet seed bead and a white seed bead. Then, add a white seed bead. Finish the row on a decrease with a violet seed bead.
Start the next row of brick stitch on decrease with a violet seed bead and a teal seed bead. Finish the row on a decrease with a violet seed bead.
Repeat steps 1-5 two times for a total of three daisy focals
Stitch an earwire to the top of one of the daisy focals. Then, position your thread at the bottom center of the daisy and stitch on a closed jump ring. Secure and trim any threads left on this daisy after securing your jump ring in place.
Stitch the second daisy focal to the bottom of the jump ring attached to the first daisy focal. Position your thread at the bottom center of the daisy and stitch on a closed jump ring. Secure and trim any threads left on this daisy after securing your jump ring in place.
Stitch the third daisy focal to the bottom of the jump ring attached to the first daisy focal. Secure and trim any threads left on this daisy.
Repeat steps 1-9 to make the other earring.