For this design, I really wanted to showcase the richness of rose gold. The netting looks complex, but it comes together sooner than you'd think!
Amazing rose gold tones and a fabulous netted pattern make this necklace gleam like a royal treasure. Crystal bicones and pearls really dazzle in this design, creating glints and gleams from every angle. This would make a stunning bridal necklace or an eye-catching piece for a fancy night out.
In order to create this necklace, you will create the fringed section first and then build toward the back on each side to get the right fit. Use KO beading thread or FireLine. Thread your needle with a comfortable working length of thread. You can double this length and leave half of it as a tail to use on one side of the necklace later if you like. Add a stopper bead to the thread. If you run out of thread while working and need to start a new thread, please see our note about adding thread in Step 8.
Following our Rose Gold Royalty Diagram PDF, add the following beads to your thread:
One 4mm bicone in Crystal Rose Gold 2x
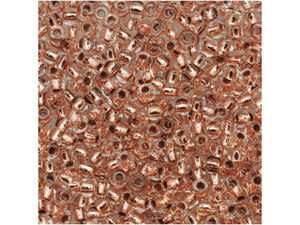
Three TOHO 11/0 bead rounds in copper lined crystal
Working down toward where you started, add the following beads:
Three 11/0 beads
One 3mm pearl
Three 11/0 beads
Go through the 3mm bicone from the previous row. This will start the netted pattern. Add the following:
Five 11/0 beads
One 4mm pearl
Three 11/0 beads
One 3mm bicone
Three 11/0 beads
Go through the 4mm bicone from the previous row.
Now you are going to create the first drop section containing a bicone pendant. Add the following beads:
Three 11/0 beads
One 3mm bicone
Two 11/0 beads
One 4mm pearl
Three 15/0 beads
One 6mm bicone pendant in Crystal Rose Gold 2x
This is the bottom drop. Now turn your needle up and work toward the top again. Add three 15/0 beads and go back through the 4mm pearl. Add the following:
Two 11/0 beads
One 3mm bicone
Three 11/0 beads
One 4mm bicone
Three 11/0 beads
One 3mm bicone
Three 11/0 beads
Go through the existing 4mm pearl in the previous row. Add five 11/0 beads to the thread, one 3mm bicone and three 11/0 beads. Go through the existing 3mm pearl in the previous row and then add three 11/0 beads, one 3mm pearl and one 15/0 bead. You are now back up at the top edge. Continue this pattern of working from top to bottom for a total of 15 bicone pendant drop sections. Make sure to end at the top edge.
Continue on with the netting, but when you pass through the 4mm bicone near the bottom edge of the necklace, instead of another bicone pendant drop section, add the following:
Three 11/0 beads
One 3mm pearl
Three 11/0 beads
One 4mm bicone
Three 11/0 beads
One 3mm bicone
Three 11/0 beads
Now go through the 4mm pearl from the previous row and continue the netted pattern to work toward the top again. Repeat this pattern until you have about eight pearl sections at the bottom edge. On you last section, after going through the existing 4mm pearl, do not add more beads. Instead, weave through the existing beads up to the next 3mm pearl. Stop here for now and leave the thread intact.
Using the tail length of thread that was left on the other side of the necklace, repeat the process to create the other side of the necklace. At this point, check to make sure the necklace is the right fit. You may want to add or remove sections to get the right fit. To add the button, add three 15/0 beads, one 11/0 bead, the 12x6mm double spike bead in Crystal Rose Gold 2x and a 3mm pearl. Go back through the spike bead and the 11/0 bead. Then, add three 15/0 beads. Go back through the 3mm pearl you started from. Reinforce the button by circling through all of the beads a few more times. Tie the thread off by weaving it out into the netted pattern and knot to existing threads here and there. Trim the end.
For the loop closure, with your thread still exiting out of the 3mm pearl, add two 15/0 beads, six 11/0 beads, two 15/0 beads, six 11/0 beads and two 15/0 beads. Loop back through the 3mm pearl you started from. Reinforce the loop by circling through all of the beads a few more times. Tie the thread off by weaving it out into the netted pattern and knot to existing threads here and there. Trim the end.
If you find you run out of thread while creating this necklace, it is easy to add more. When you find you only have 8-10 inches left on your thread, leave this thread as a tail for now, with the needle still on the thread. With a new length of thread and a second needle attached to it, weave through a few beads in the necklace. Knot it to the existing thread and then go through a few more beads to reach the tail. Leave the tail in place, but continue your bead pattern on the new thread. Go back and finish the old tail by knotting it to existing thread in the pattern. You do this in the same way you added the new thread, by going through some beads and knotting. Trim both tails (the old thread and the tail of the new thread), but not your working thread.
List of Components: 6328 6mm Bicone Pendant Crystal Rose Gold 2x (6328-CRG2X6, qty 15) 5328 4mm Bicone Crystal Rose Gold 2x (5328-CRG2X4, qty 32) 5328 3mm Bicone Crystal Rose Gold 2x (5328-CRG2X3, qty 122) 5810 3mm Round Pearl Rose Gold (5810-ROG3, qty 79) 5810 4mm Round Pearl Rose Gold (5810-ROG4, qty 46) TOHO Bead Round 11/0 Copper Lined Crystal (TBRD11-740, qty 2) TOHO Bead Round 15/0 Copper Lined Crystal (TBRD15-740, qty 1) 5747 12x6mm Double Spike Bead Crystal Rose Gold 2x (5747-CRG2X12, qty 1)
Add all available items to your cart at once or edit the quantities below.
Any items with quantities lower than stated minimums will default to the minimum in your cart.
Nice choice! All or most of the products needed for this project are shown
below with quantities. Sometimes we sell out of components and aren’t able to order more from
the manufacturer (we know, it is very disappointing to us, too). Use the opportunity to mix up
the design and make it yours by substituting similar products or altering the entire color
scheme—it’s up to you!
Please wait while we add the products to your cart.
Rose Gold Royalty Necklace Tutorial
Netted Rose Gold Necklace with Crystals
designed byCheri Carlson
Skill LevelIntermediate
TechniqueSeed-Beading
Approximate Size14 Inches
For this design, I really wanted to showcase the richness of rose gold. The netting looks complex, but it comes together sooner than you'd think!
Amazing rose gold tones and a fabulous netted pattern make this necklace gleam like a royal treasure. Crystal bicones and pearls really dazzle in this design, creating glints and gleams from every angle. This would make a stunning bridal necklace or an eye-catching piece for a fancy night out.
Supplies
TOHO Bead Round 11/0 Copper Lined Crystal, 2.5-Inch Tube
Code TBRD11-740
$2.87
$3.59
×2
The BeadSmith 10 Long English Beading Needles 4-Pack
Code NEED-04
$4.49
$6.56
×1
PRESTIGE 5810 4mm Round Crystal Pearl Rose Gold - Min Qty 10
Code 5810-ROG4
$0.11
$0.16
×46
PRESTIGE 5810 3mm Round Crystal Pearl Rose Gold - Min Qty 10
Code 5810-ROG3
$0.09
$0.15
×79
PRESTIGE 5328 3mm Bicone Bead Crystal Rose Gold 2x - Min Qty 10
Code 5328-CRG2X3
$0.14
$0.24
×122
TOHO Bead Round 15/0 Copper Lined Crystal, 2.5-Inch Tube
Code TBRD15-740
$3.46
$4.94
×1
Step-by-Step Instructions
In order to create this necklace, you will create the fringed section first and then build toward the back on each side to get the right fit. Use KO beading thread or FireLine. Thread your needle with a comfortable working length of thread. You can double this length and leave half of it as a tail to use on one side of the necklace later if you like. Add a stopper bead to the thread. If you run out of thread while working and need to start a new thread, please see our note about adding thread in Step 8.
Following our Rose Gold Royalty Diagram PDF, add the following beads to your thread:
One 4mm bicone in Crystal Rose Gold 2x
Three TOHO 11/0 bead rounds in copper lined crystal
Working down toward where you started, add the following beads:
Three 11/0 beads
One 3mm pearl
Three 11/0 beads
Go through the 3mm bicone from the previous row. This will start the netted pattern. Add the following:
Five 11/0 beads
One 4mm pearl
Three 11/0 beads
One 3mm bicone
Three 11/0 beads
Go through the 4mm bicone from the previous row.
Now you are going to create the first drop section containing a bicone pendant. Add the following beads:
Three 11/0 beads
One 3mm bicone
Two 11/0 beads
One 4mm pearl
Three 15/0 beads
One 6mm bicone pendant in Crystal Rose Gold 2x
This is the bottom drop. Now turn your needle up and work toward the top again. Add three 15/0 beads and go back through the 4mm pearl. Add the following:
Two 11/0 beads
One 3mm bicone
Three 11/0 beads
One 4mm bicone
Three 11/0 beads
One 3mm bicone
Three 11/0 beads
Go through the existing 4mm pearl in the previous row. Add five 11/0 beads to the thread, one 3mm bicone and three 11/0 beads. Go through the existing 3mm pearl in the previous row and then add three 11/0 beads, one 3mm pearl and one 15/0 bead. You are now back up at the top edge. Continue this pattern of working from top to bottom for a total of 15 bicone pendant drop sections. Make sure to end at the top edge.
Continue on with the netting, but when you pass through the 4mm bicone near the bottom edge of the necklace, instead of another bicone pendant drop section, add the following:
Three 11/0 beads
One 3mm pearl
Three 11/0 beads
One 4mm bicone
Three 11/0 beads
One 3mm bicone
Three 11/0 beads
Now go through the 4mm pearl from the previous row and continue the netted pattern to work toward the top again. Repeat this pattern until you have about eight pearl sections at the bottom edge. On you last section, after going through the existing 4mm pearl, do not add more beads. Instead, weave through the existing beads up to the next 3mm pearl. Stop here for now and leave the thread intact.
Using the tail length of thread that was left on the other side of the necklace, repeat the process to create the other side of the necklace. At this point, check to make sure the necklace is the right fit. You may want to add or remove sections to get the right fit. To add the button, add three 15/0 beads, one 11/0 bead, the 12x6mm double spike bead in Crystal Rose Gold 2x and a 3mm pearl. Go back through the spike bead and the 11/0 bead. Then, add three 15/0 beads. Go back through the 3mm pearl you started from. Reinforce the button by circling through all of the beads a few more times. Tie the thread off by weaving it out into the netted pattern and knot to existing threads here and there. Trim the end.
For the loop closure, with your thread still exiting out of the 3mm pearl, add two 15/0 beads, six 11/0 beads, two 15/0 beads, six 11/0 beads and two 15/0 beads. Loop back through the 3mm pearl you started from. Reinforce the loop by circling through all of the beads a few more times. Tie the thread off by weaving it out into the netted pattern and knot to existing threads here and there. Trim the end.
If you find you run out of thread while creating this necklace, it is easy to add more. When you find you only have 8-10 inches left on your thread, leave this thread as a tail for now, with the needle still on the thread. With a new length of thread and a second needle attached to it, weave through a few beads in the necklace. Knot it to the existing thread and then go through a few more beads to reach the tail. Leave the tail in place, but continue your bead pattern on the new thread. Go back and finish the old tail by knotting it to existing thread in the pattern. You do this in the same way you added the new thread, by going through some beads and knotting. Trim both tails (the old thread and the tail of the new thread), but not your working thread.
List of Components: 6328 6mm Bicone Pendant Crystal Rose Gold 2x (6328-CRG2X6, qty 15) 5328 4mm Bicone Crystal Rose Gold 2x (5328-CRG2X4, qty 32) 5328 3mm Bicone Crystal Rose Gold 2x (5328-CRG2X3, qty 122) 5810 3mm Round Pearl Rose Gold (5810-ROG3, qty 79) 5810 4mm Round Pearl Rose Gold (5810-ROG4, qty 46) TOHO Bead Round 11/0 Copper Lined Crystal (TBRD11-740, qty 2) TOHO Bead Round 15/0 Copper Lined Crystal (TBRD15-740, qty 1) 5747 12x6mm Double Spike Bead Crystal Rose Gold 2x (5747-CRG2X12, qty 1)